Configuring Supplier Portal Access and Settings
Setting up the Supplier Portal is a crucial step in streamlining communication and data sharing between your company and your partners. By following this guide, you will learn how to assign managers, authorize supplier administrators, and control how your product information is displayed to the supplier.
Navigation Path
To access these settings, navigate to:
- Suppliers (sidebar)
- Click View List
- Select your Supplier
- Portal Access tab.
Step-by-Step Configuration
step 1. Assign an Internal Purchasing Manager
The Purchasing Manager is the primary contact within your organization for this specific supplier.
-
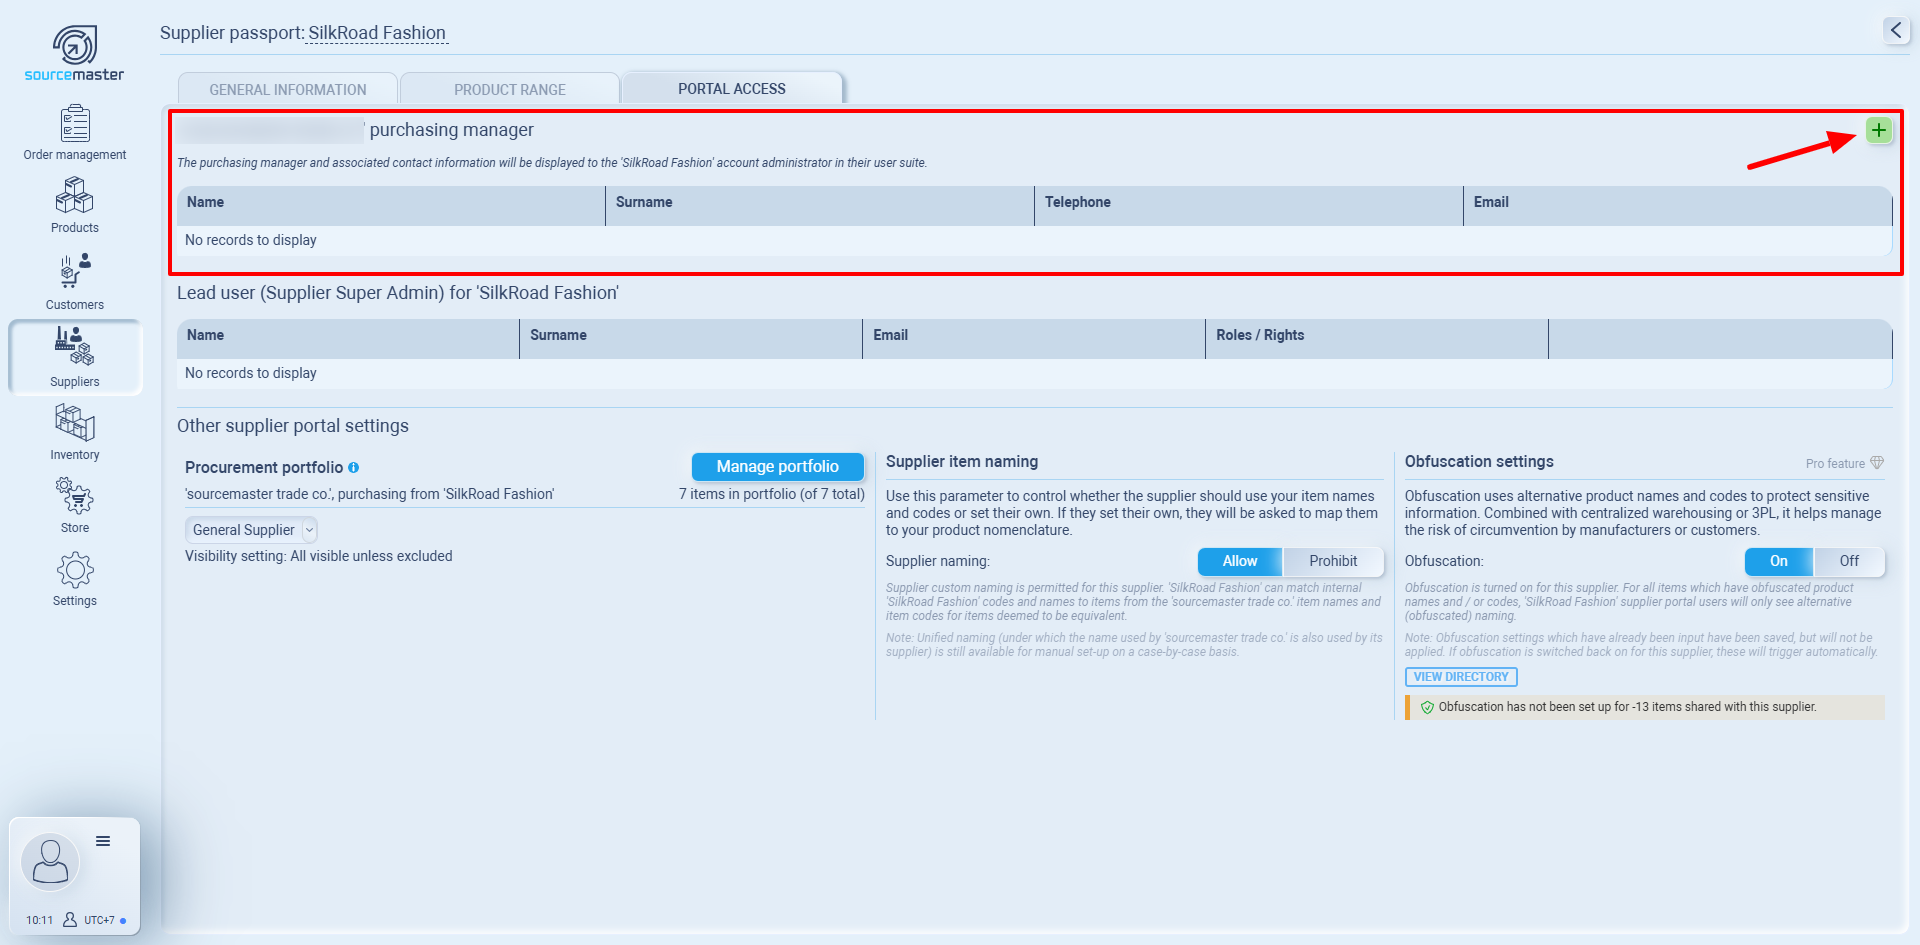
Locate the '{your company name} purchasing manager' section.
-
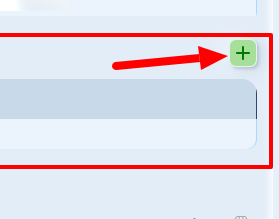
Click the Green Plus (+) button on the right side of the header.
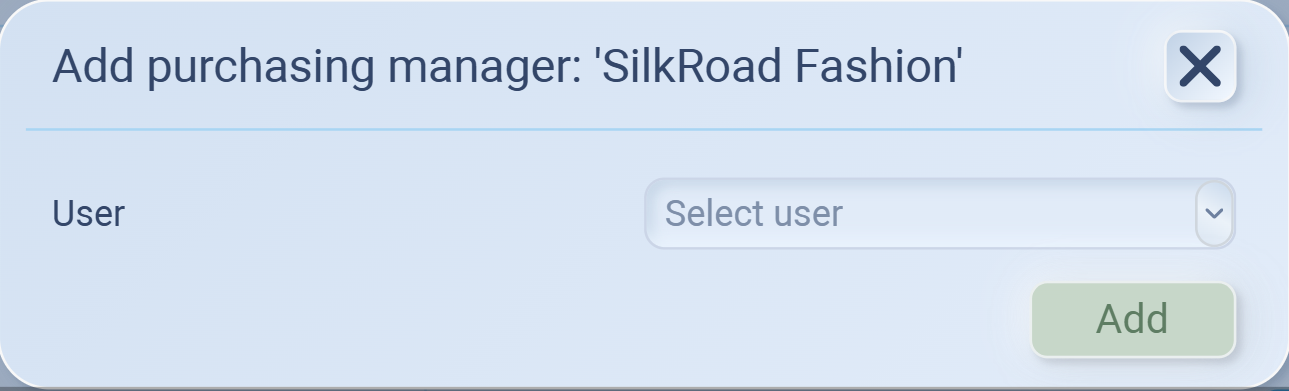
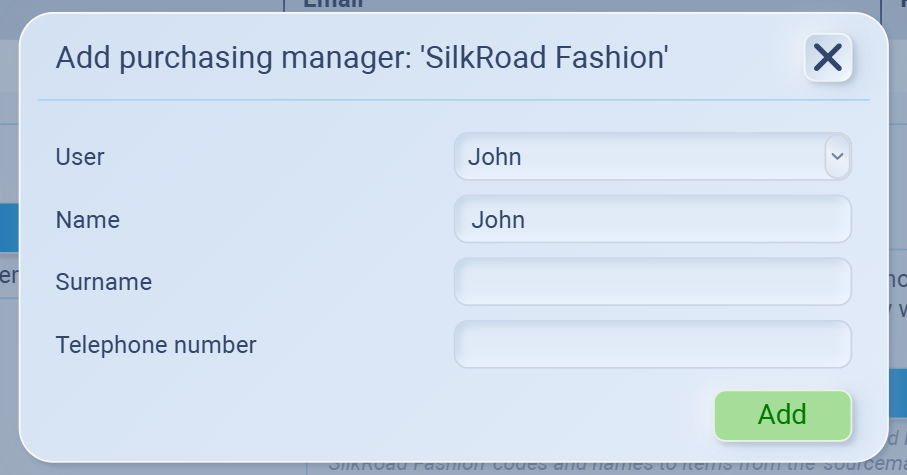
- Select user from the dropdown list (from your company)
- Fill the Name, Surname, Telephone number
- Click Add
Select the appropriate team member (that responsible for dealing with this supplier directly e.g., Purchasing Manager) from your user list.
step 2. Assign a Lead User (Supplier Super Admin)
The Lead User is the person at the supplier's company who will manage their own team's access to the portal.
-
Under the Lead user (Supplier Super Admin) section, click the Add button (if no records exist).
-
Enter the Name, Surname, and Email of the supplier's designated administrator.

-
Once added, there will be an invitation email sent to the supplier super admin's inbox.

-
They need to go creating account for accessing portal, click Complete registration in the email to set password for their account
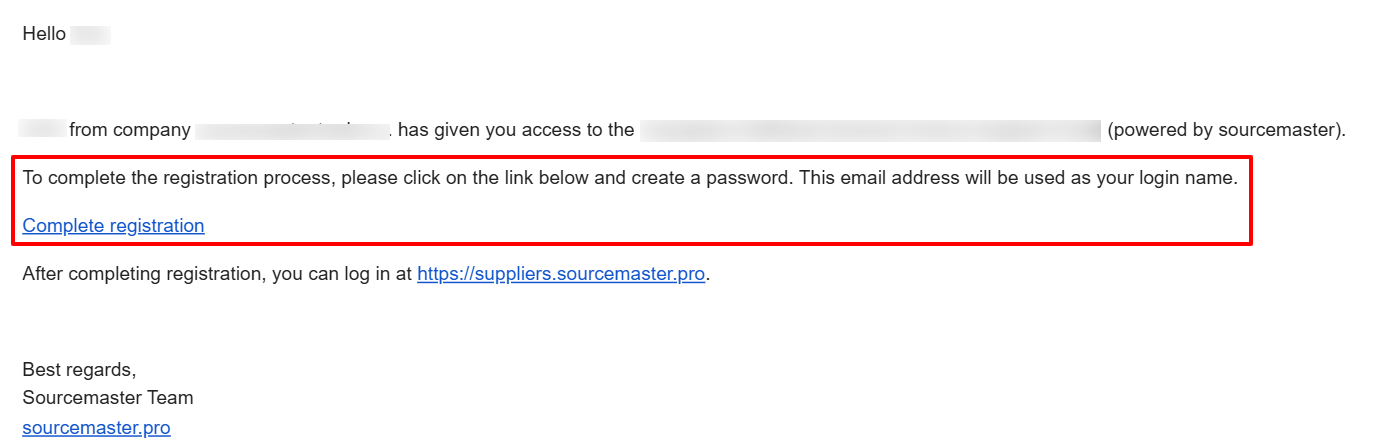
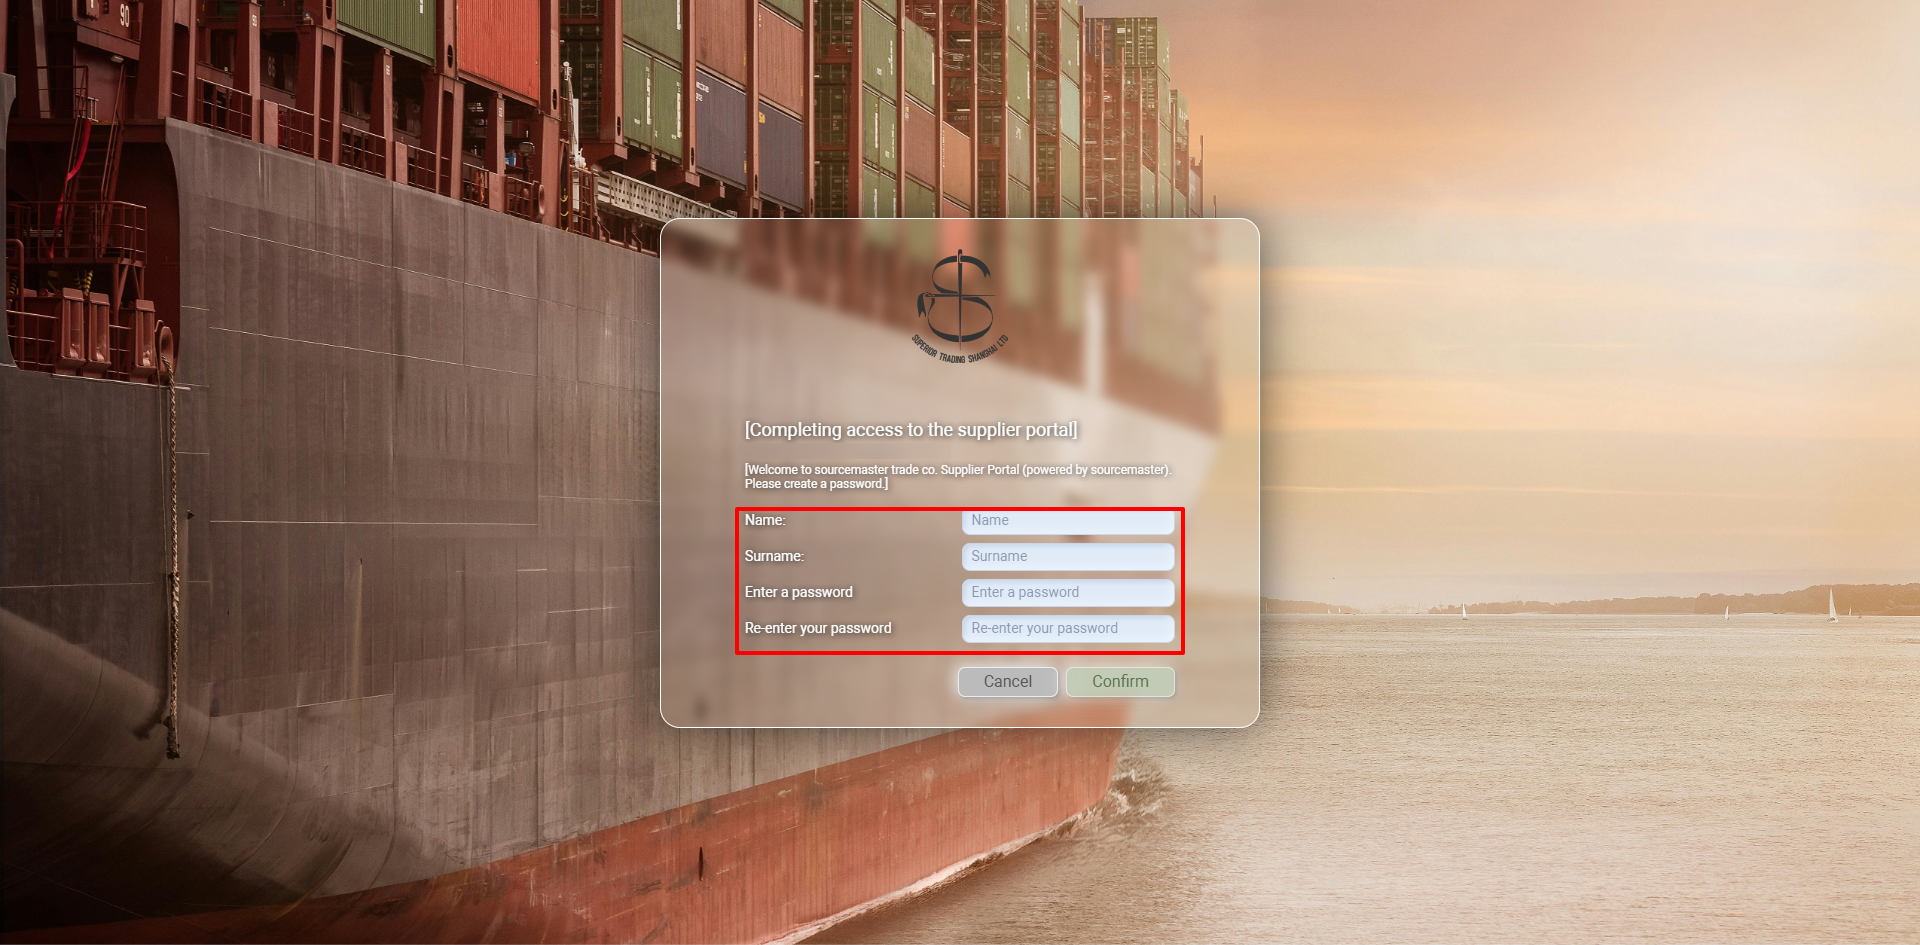
- Once they set the password, use it to log in to supplier portal here https://suppliers.sourcemaster.pro/
Note that you can disable/enable the access anytime by toggling at the super admin list
step 3. Manage the Procurement Portfolio
This determines which specific items the supplier can see and interact with.
- Procurement portfolio
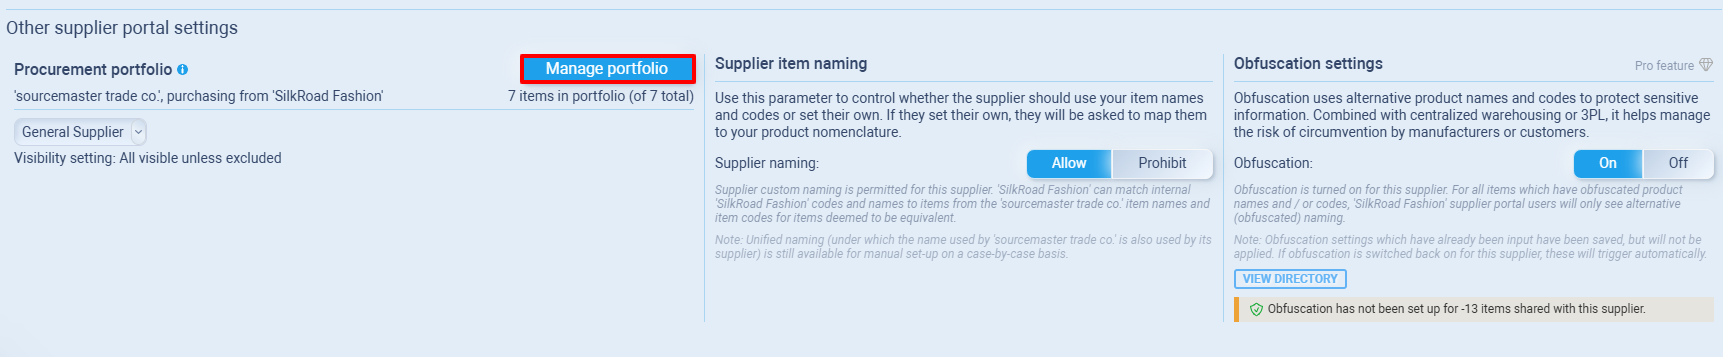
The Procurement Portfolio is the primary filter that controls which items from your master database are visible to a specific supplier. Managing this portfolio effectively ensures your suppliers only interact with relevant products and keeps your data secure.
- In the Procurement portfolio card, click the blue Manage portfolio button.
- Review the Item List
Once the "Procurement portfolio" window opens, you will see a list of your products organized by Item code, Item name, Categories, and Groups. Use these columns to identify the products you wish to manage. - Change Item Visibility
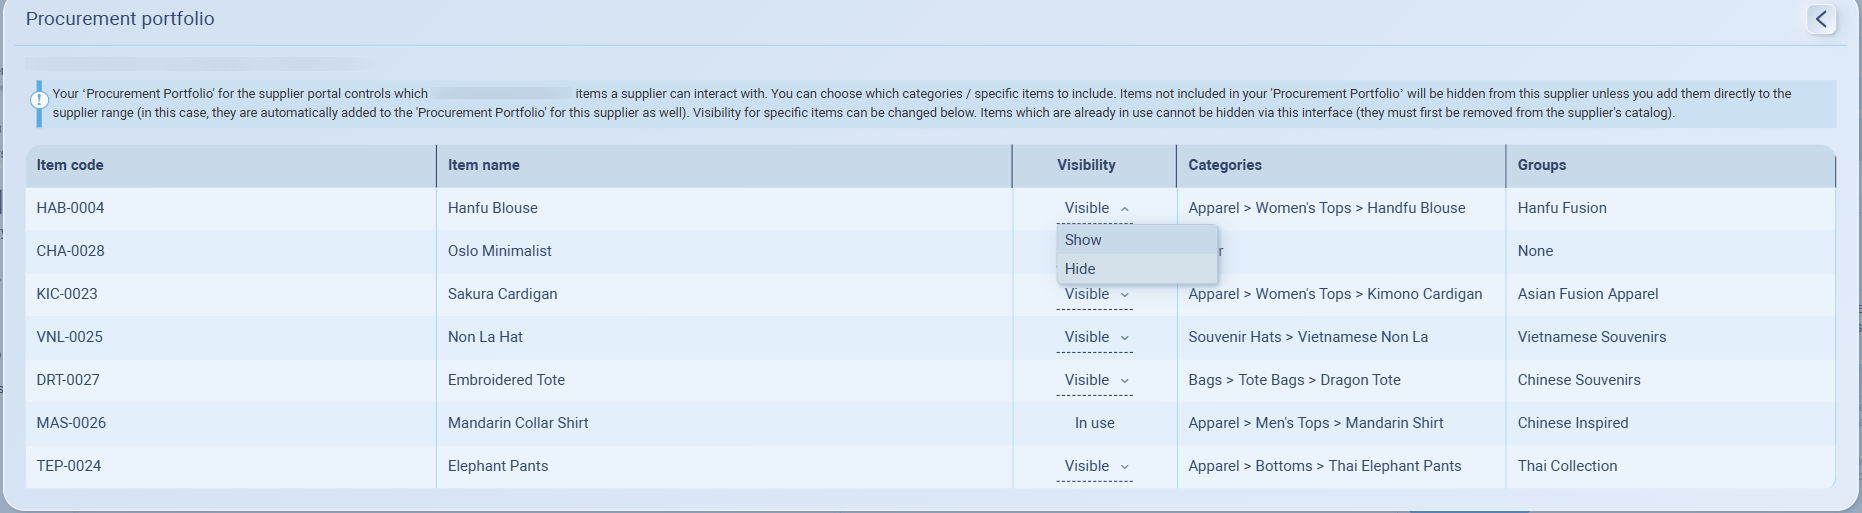
To control whether a supplier can see a specific item:-
Locate the Visibility column for the chosen item.
-
Click the dropdown arrow next to the current status (e.g., "Visible").
-
Select Show to make the item visible in the supplier portal.
-
Select Hide to remove the item from the supplier's view.
-
- Managing Portfolio Visibility
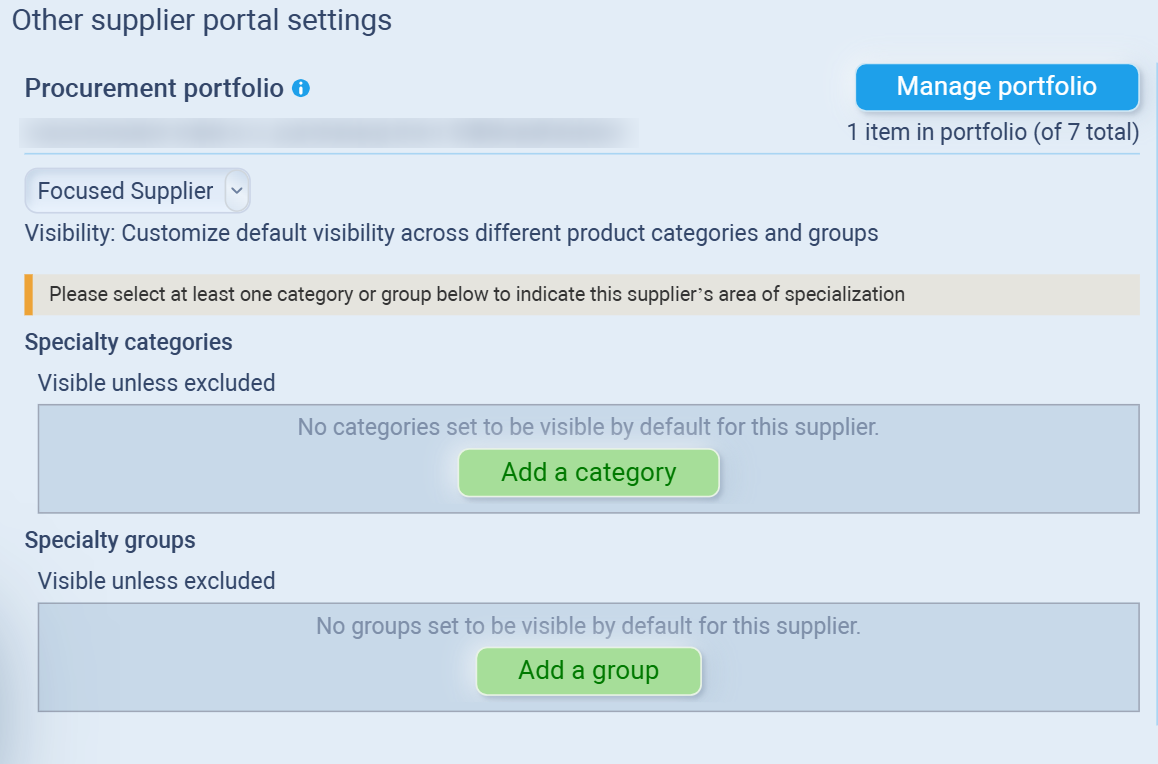
By defining a supplier as General, Focused, or Niche, you can automate which product categories they see, saving you from manually managing visibility for every single item.
- Select Supplier Classification
Click the dropdown menu (defaulted to "General Supplier") to choose the classification that best fits this partner:
-
General Supplier: Best for broad partners. By default, all items in your system are visible to them unless you manually exclude specific items in the "Manage Portfolio" window.
-
Focused Supplier: Best for partners who handle specific lines of business. Visibility is restricted to chosen Categories.
-
Niche Supplier: Best for highly specialized partners. Visibility is restricted to specific Product Groups.
-
- Select Supplier Classification
- Configure Supplier Item Naming
You can decide if the supplier must use your internal item names or if they can use their own.
-
Locate the Supplier item naming section.
-
Allow: Choose this if you want the supplier to map their internal codes/names to your nomenclature.
-
Prohibit: Choose this to force the supplier to use your exact item names and codes for all transactions.
-
Step 5. Enable Obfuscation Settings
Obfuscation protects sensitive information by using alternative product names and codes. This is particularly useful when using 3PL (Third Party Logistics) to prevent manufacturers or customers from seeing proprietary data.
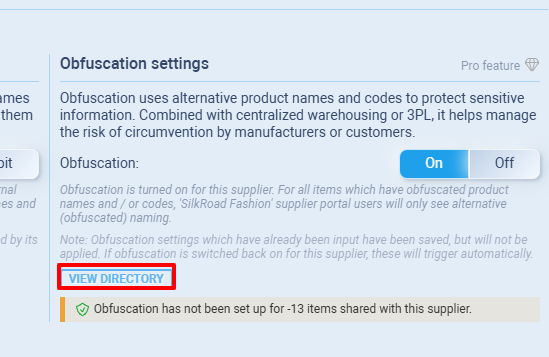
- Enable Obfuscation
-
Toggle Switch: Click the On/Off toggle to activate the feature.
-
Pro Requirement: Please note that Obfuscation is an Advanced Confidentiality feature. The "On" toggle is only functional for users on a Pro plan or higher.
-
Automatic Activation: Once turned "On," any alternative names you have previously saved in the directory will immediately be applied to the supplier's view.
-
- Configure the Alias Directory
To define what the supplier actually sees, you must set up your alternative naming conventions.- Click the blue VIEW DIRECTORY button.
- In the pop-up window, you will see a list of items shared with this supplier.
- Original naming: This column shows your internal Item code and Item name for your reference.
- Alternative name: Use these fields to enter the alias:
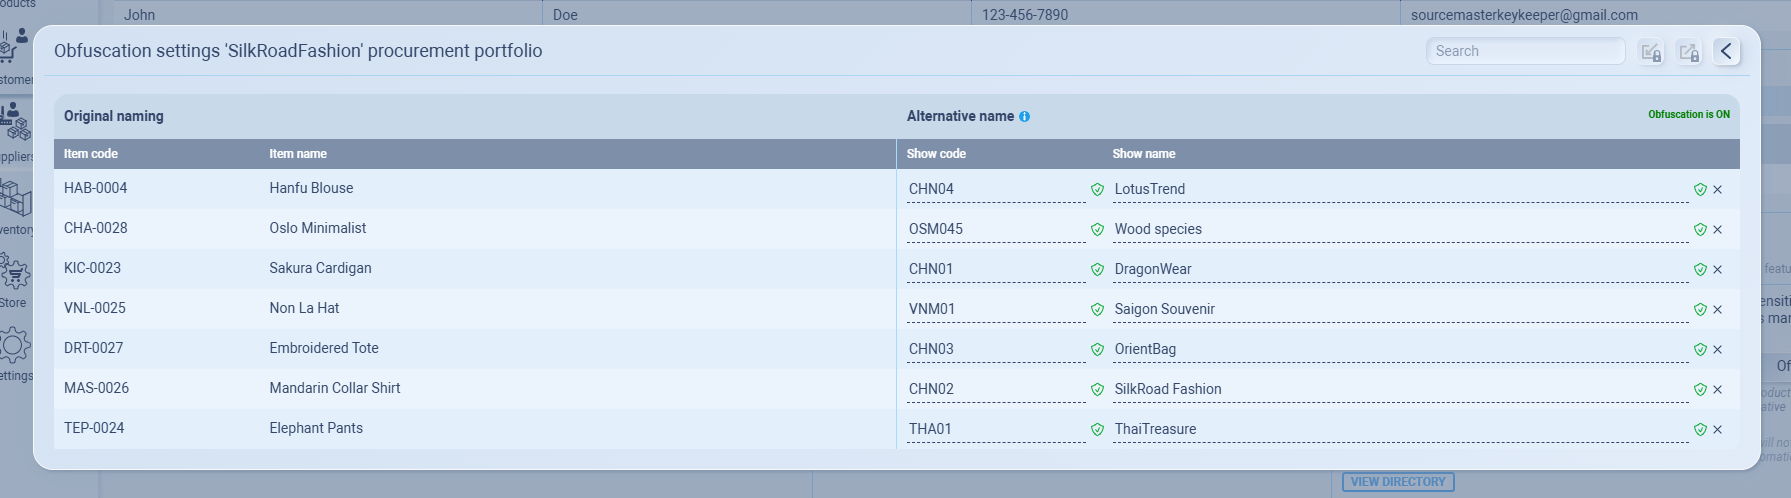
- Show code: Enter the code you want the supplier to see (e.g., change HAD-0001 to CHN04).
- Show name: Enter the name the supplier should see (e.g., change Hanfu Blouse to LotusTrend).
- Check the Green Checkmark next to the field to see if the obfuscation works.
- Click the blue VIEW DIRECTORY button.
- Managing the List
The directory window includes several tools to help you manage large portfolios:
-
Search Bar: Quickly find specific items by their original code or name.
-
Bulk Actions: Icons in the top right allow you to refresh the list or bulk-save changes.
-
Warning Bar: If you see a yellow warning stating "Obfuscation has not been set up for [X] items," it means those items are visible to the supplier with their original names. You should enter aliases for these items immediately to maintain privacy.
Accessing the Supplier Portal (Supplier POV)
As a partner of a sourcing company using SourceMaster, the Supplier Portal is your primary gateway for managing purchase orders, updating stock levels, and confirming product pricing in real-time. This guide will walk you through the first-time setup and standard login procedure to ensure you stay connected with your buyers.
Prerequisites
You must be invited by your sourcing partner's Purchasing Manager.
You need access to the corporate email address that was registered on your behalf.
Log In to the Portal
Once your password is set, you can access the portal at any time.
-
Navigate to the official portal URL: https://suppliers.sourcemaster.pro
-
Enter your Registered Email & Password Address (the one where you received the invite).
-
Click the Login button.
Think of the SourceMaster Supplier Portal as your digital storefront. By keeping your catalog updated, you ensure your sourcing partners always have the latest pricing and availability, helping you secure orders faster and minimize communication delays.
Building Your Product Range

Before you can receive orders, you must add items from the buyer's approved list to your active range:
-
Navigate to Product Catalog and click Add an item to get started.
-
Select the Item Code or Name from the dropdown menu (only items pre-authorized by your buyer will appear here).
-
Add an optional Item Description and click Add Item.
Setting Pricing and Terms
Once an item is in your list, you need to define the commercial terms:
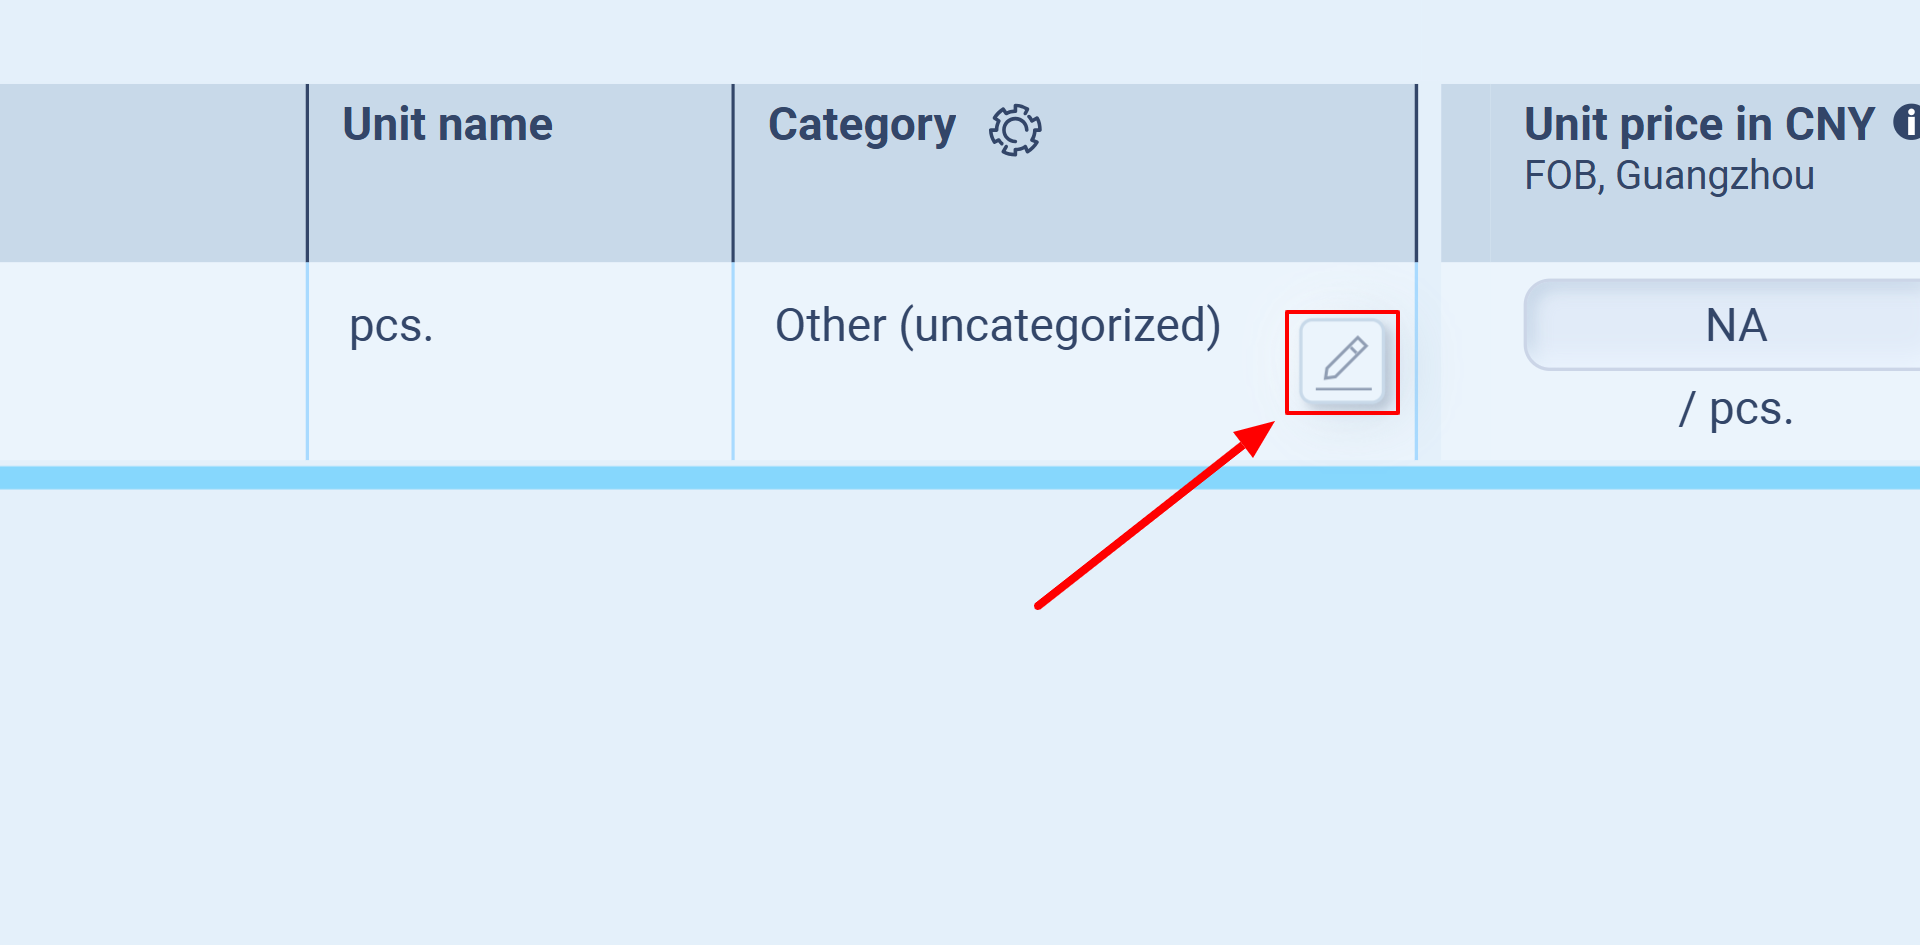
-
Click the Pencil (Edit) icon on any item row to open the Item Information modal.
-
Enter your Default Unit Price, Minimum Order Quantity (MOQ), and Usually ships in (lead time).
-
Crucial Step: Click the PUBLISH button. Your buyer will not see your pricing updates until they are published!
4. Managing Availability
Keep your catalog accurate by using the Actions buttons at the bottom of the item details:
-
Pause Sales: Use for temporary stock-outs; buyers can still see the item but cannot place new orders.
-
Deactivate/Discontinue: Use for items you no longer supply to remove them from the buyer’s active price list.
Pro Tip: If you can't find a product in the "Add Item" list, it means your buyer hasn't shared it with you yet. A quick message to your Purchasing Manager can get that fixed in seconds!
Syncing Items via the Supplier Portal
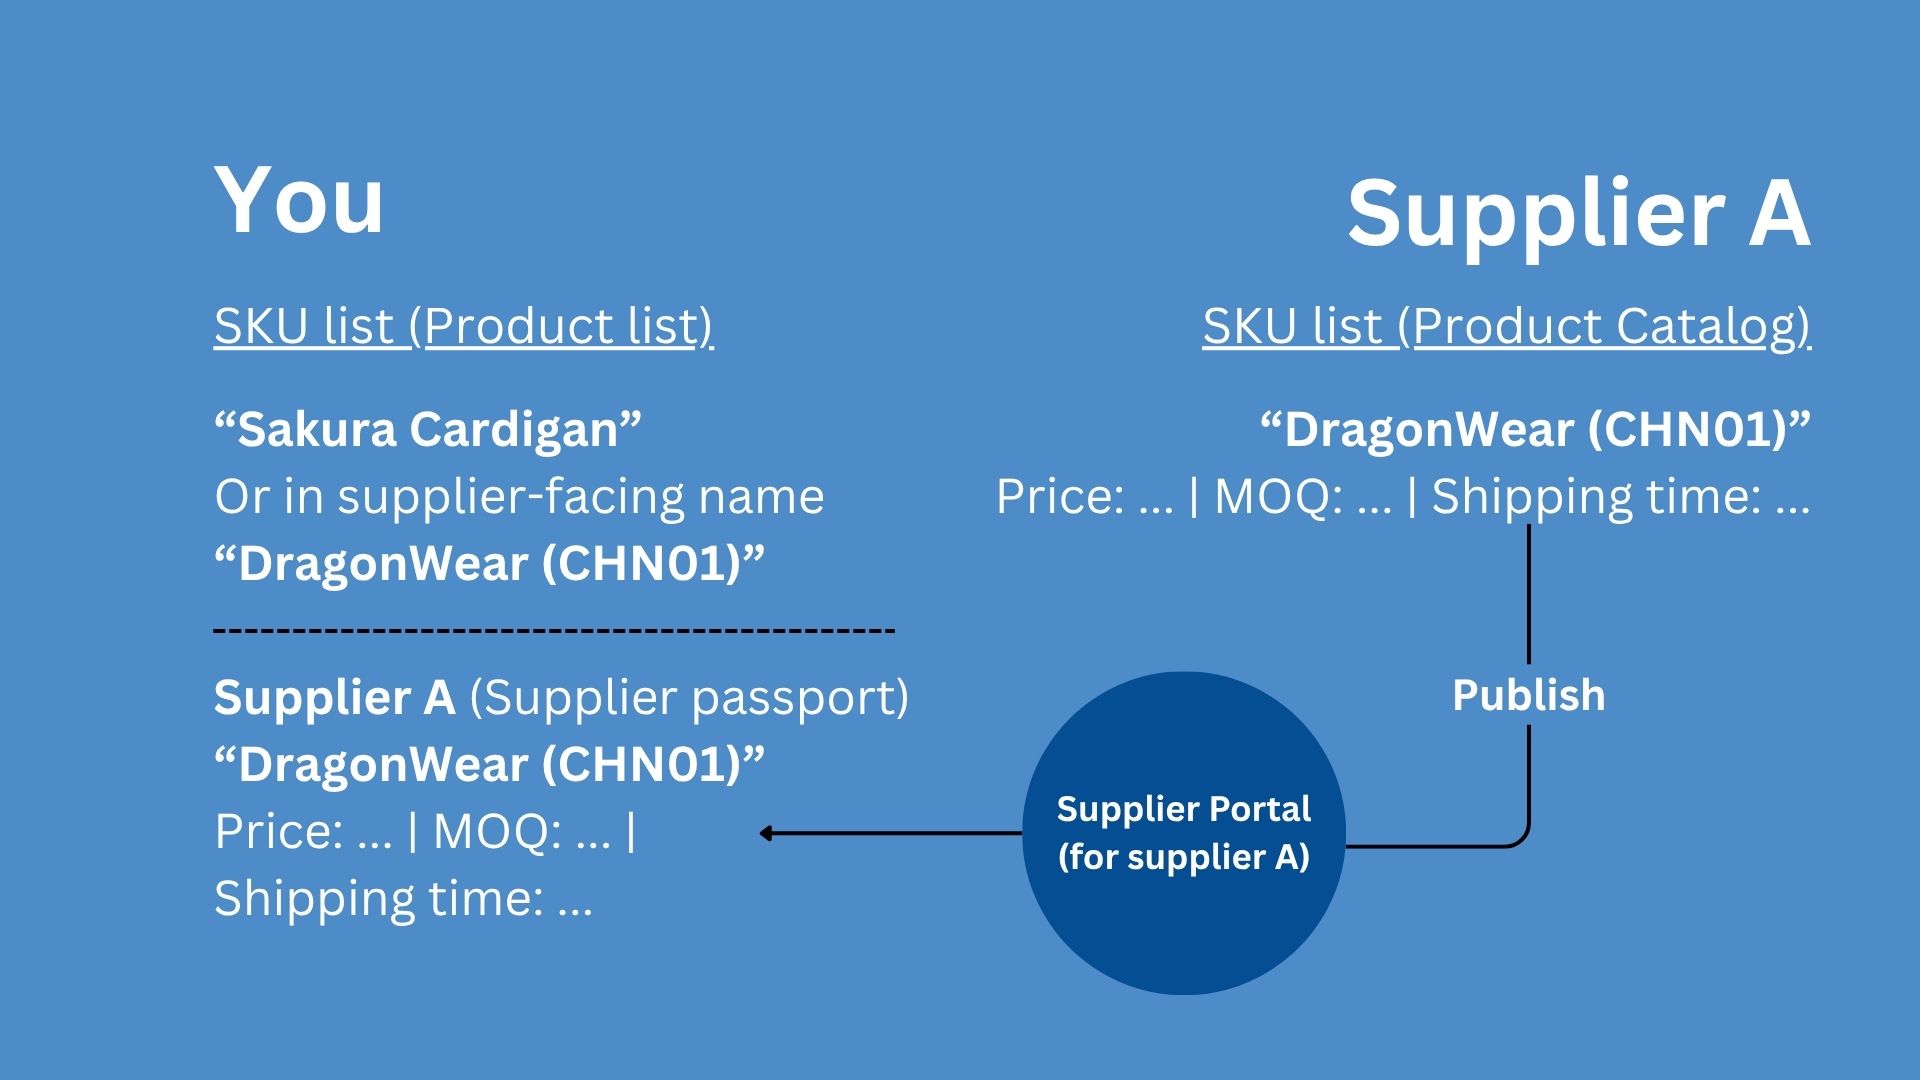
To establish a relationship between a supplier (e.g., SilkRoadFashion) and a specific product (e.g., Sakura Cardigan), the item must be linked to the supplier's profile.
While a buyer can manually add an item in the Supplier Passport > Product Range, this guide focuses on the second method: the supplier proposing and syncing the item through their own portal.
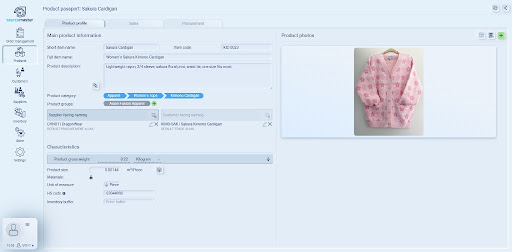
The Concept: Item Naming & Visibility
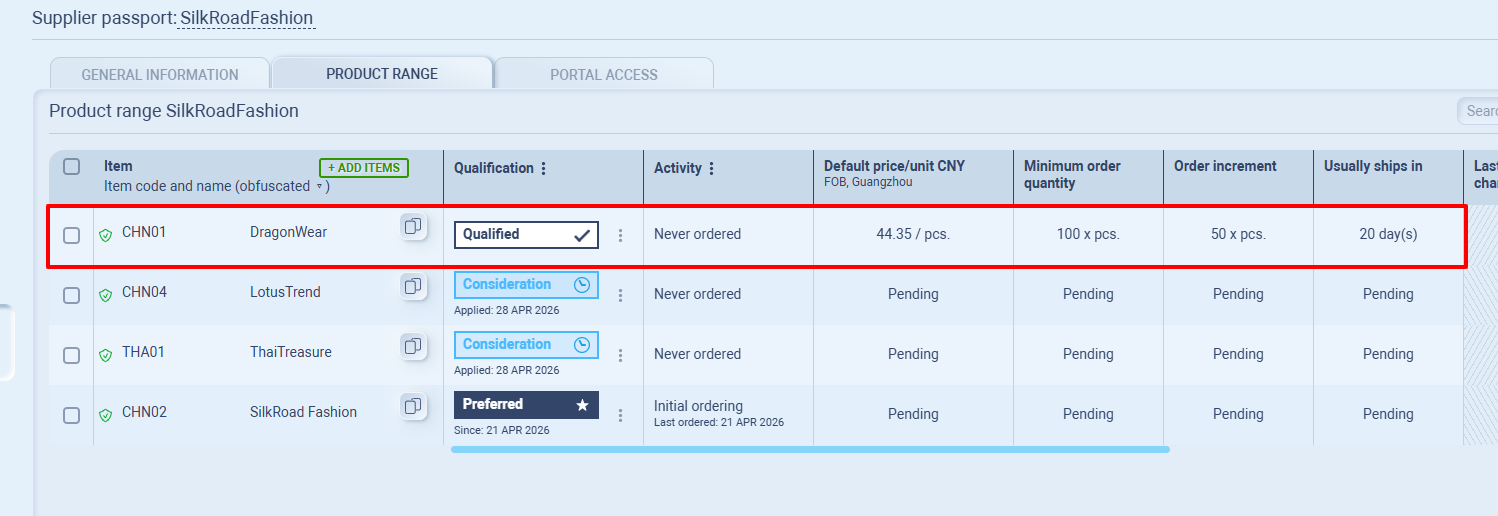
In this scenario, the buyer has configured the Sakura Cardigan with a supplier-facing alias: CHN01 - DragonWear.
When the supplier logs into the portal, they will only see the name DragonWear. To begin supplying this item, the supplier must "sync" it to their active catalog to provide pricing and lead times.
Step-by-Step: Supplier Proposal Process (Supplier POV)
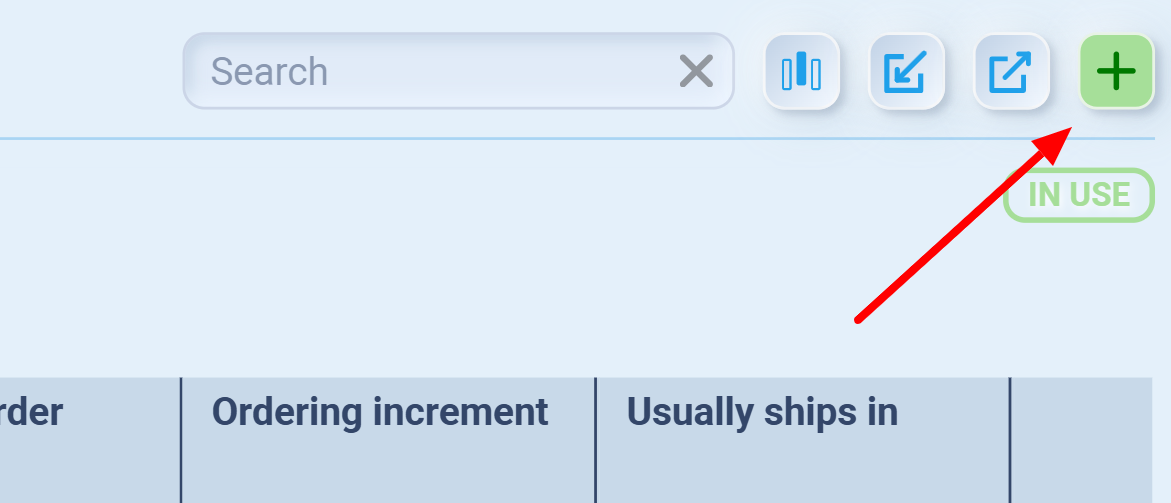
1. Initiate the Sync
-
Navigate to the Product Catalog tab.
-
Click the Green Plus (+) button in the top right corner OR click the Add an item to get started button.
2. Select the Item
-
In the Add item window, use the dropdown menu to select the item name as configured by the buyer. (e.g., DragonWear)
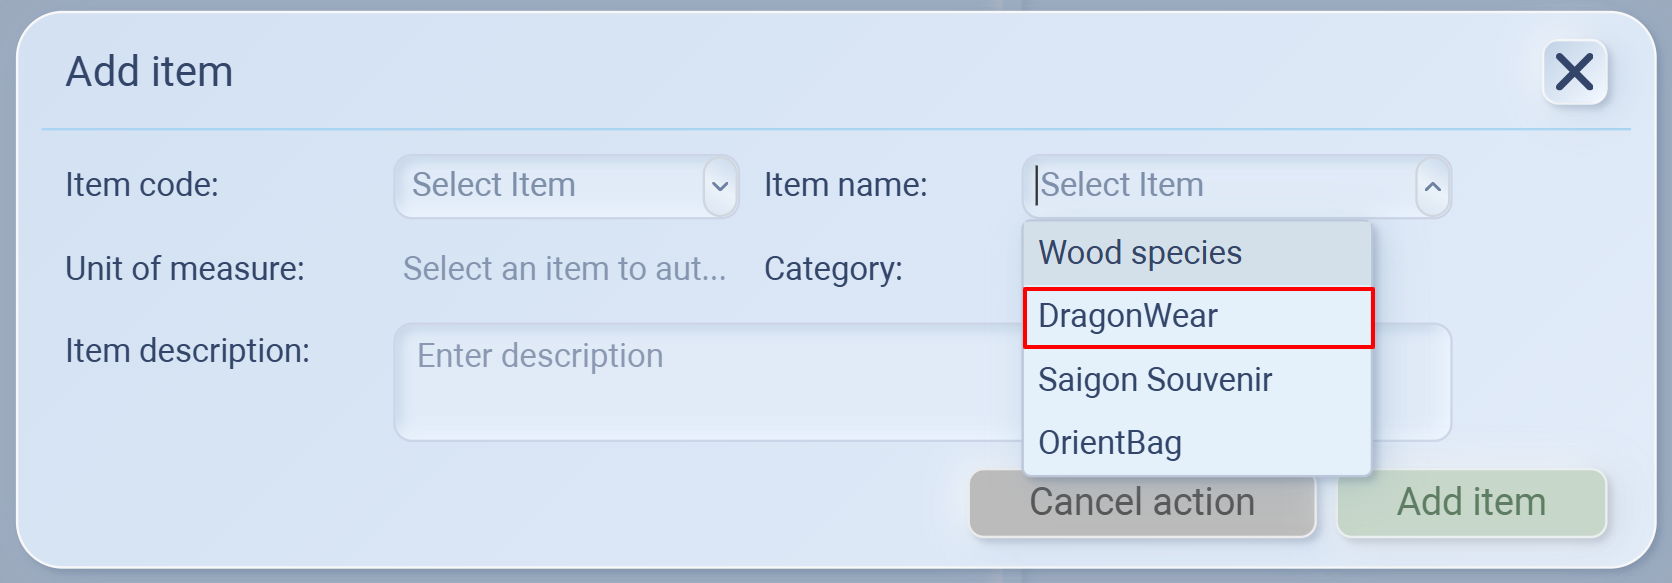
-
Click Add item.
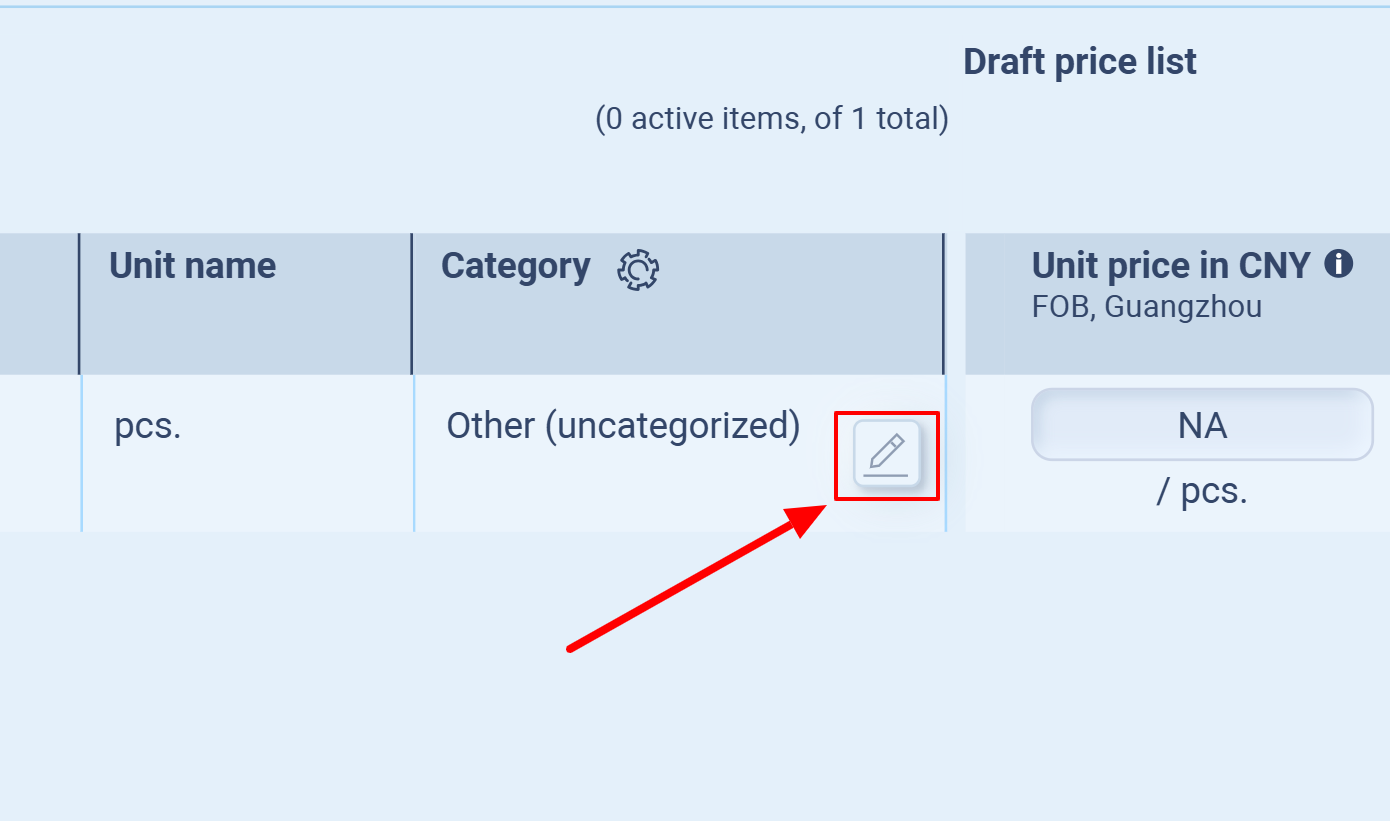
3. Locate the Item in the List
-
The item will now appear in the Product catalog list.
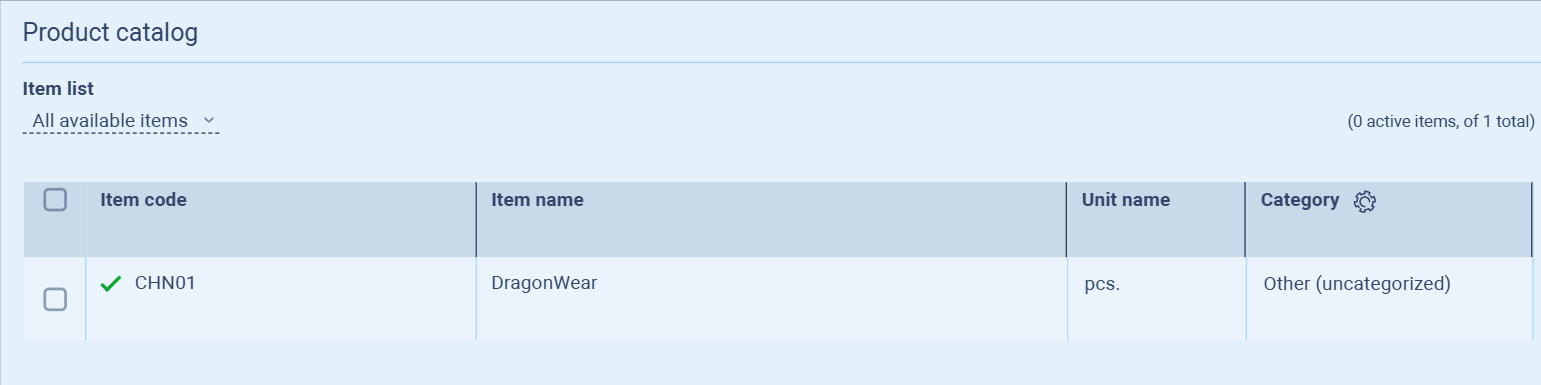
-
Note: If the item does not appear immediately, refresh the browser page.
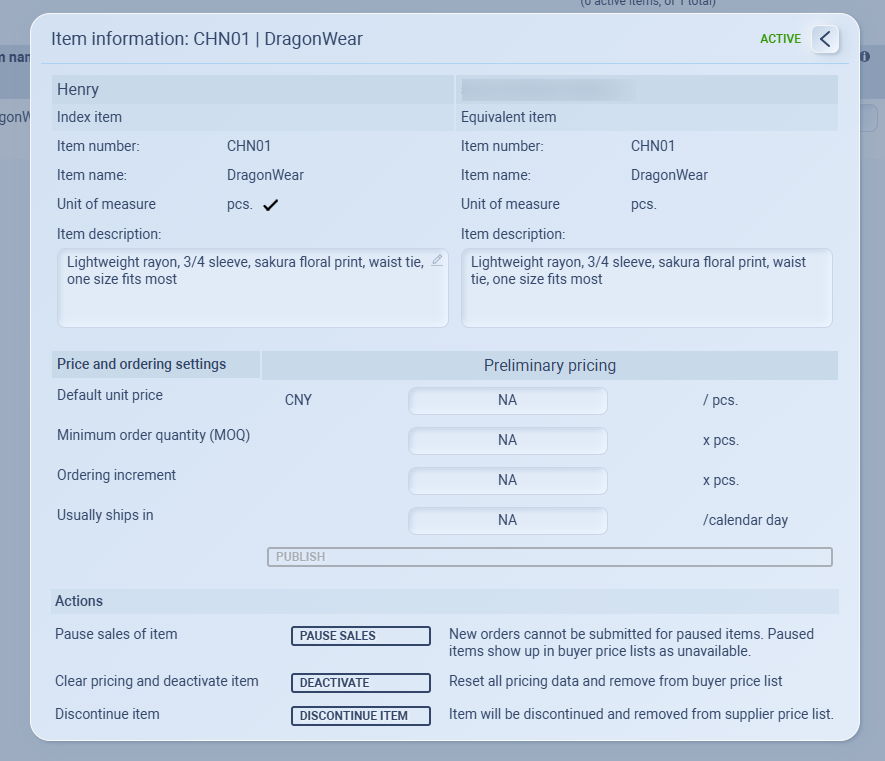
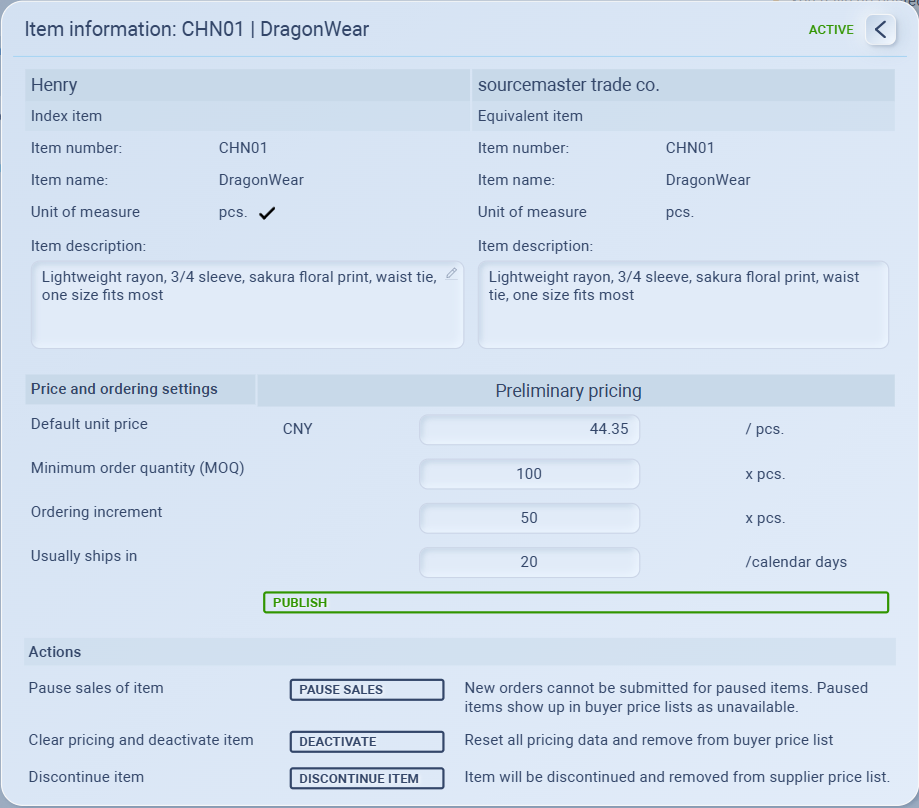
4. Configure Pricing and Terms
Within the Item information modal, the supplier can define the commercial terms:
-
Click the Pencil (Edit) icon at the far right of the item row.
-
In the Item information modal, fill in your specific details:
-
Item description: Your specific notes about the garment/product.
-
Default unit price: Your current selling price (e.g., 44.35 CNY).
-
MOQ & Ordering Increment: Your minimum requirements for an order.
-
Usually ships in: Your estimated production/shipping lead time (e.g., 20 days).
-
5. Publish to the Buyer
-
Once all details are entered, click the PUBLISH button (or PUBLISH ALL).
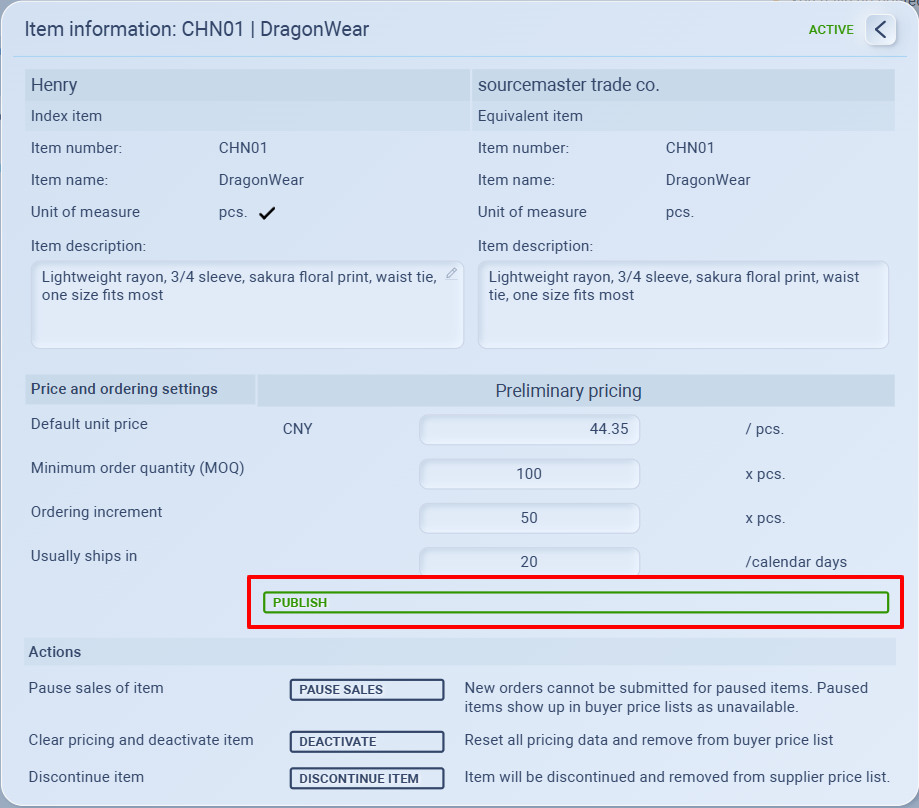
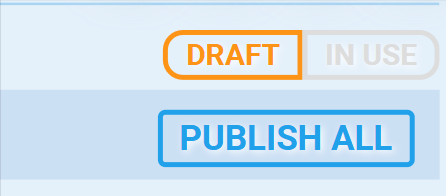
-
Pricing data is considered a "Draft" until this button is clicked.
Buyer Visibility: The Result
Once you click Publish, the data is instantly synced to the buyer’s system.
The buyer can now see your price, MOQ, and lead time under the Product Range tab of your Supplier Passport.
The buyer can now include this item in formal Purchase Orders using your published price.