A clear category structure is the backbone of fast sourcing, accurate POs, and clean reports. Follow this exact process — it takes less than 5 minutes and works for every importer we onboard.
- Go to Products → Product Categories
- Create main categories (Level 1)
At the top, click + Create new category
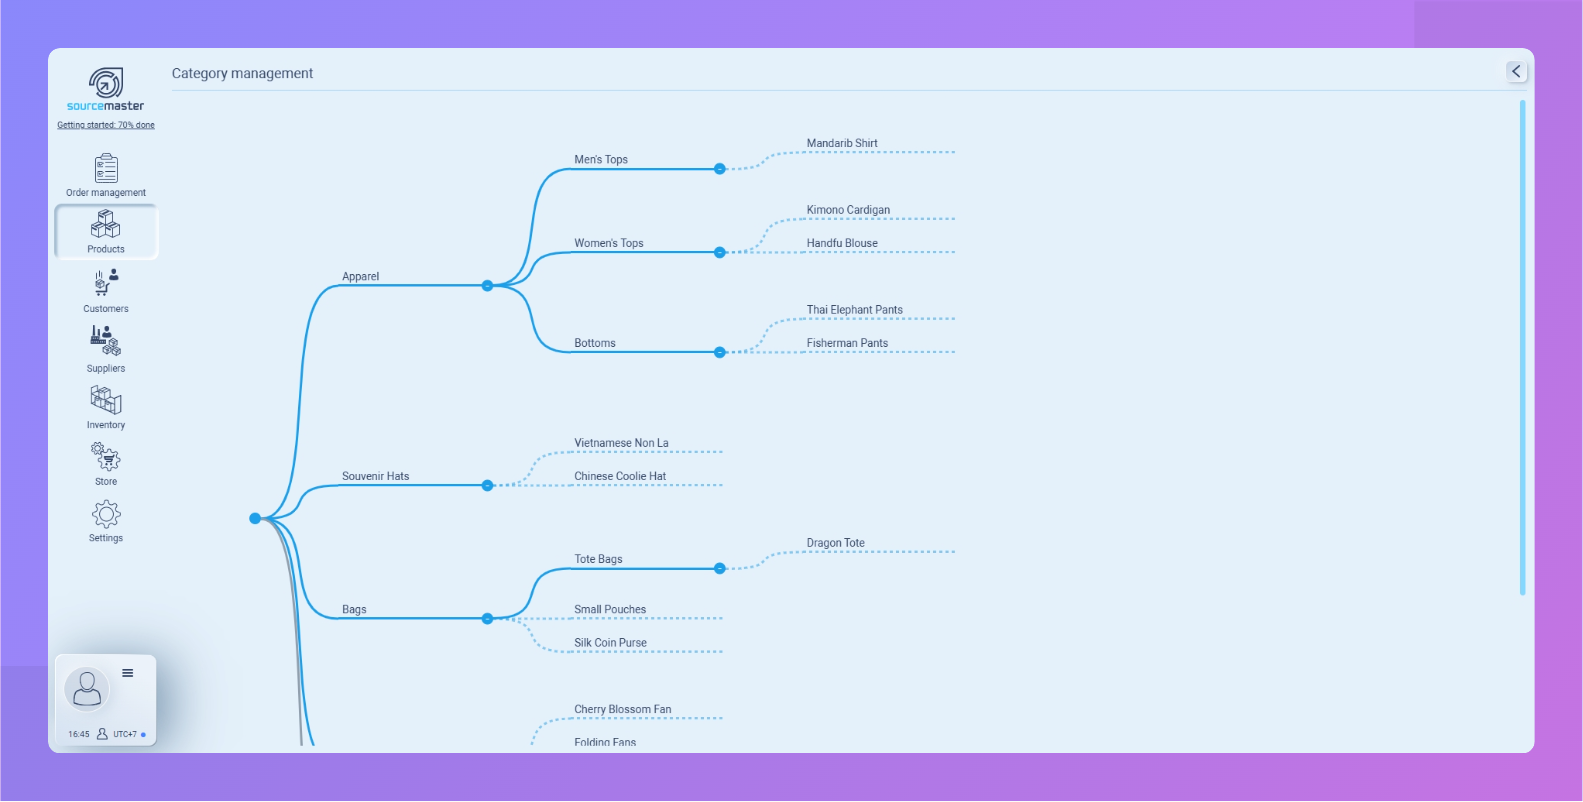
Enter broad groups, for example:
Apparel | Bags | Souvenir Hats | Accessories | Home Decor
Click Confirm. - Add sub-categories (Level 2, 3…)
Hover over any category → click + Add sub-category
Examples:
- Apparel → Women’s Tops
- Women’s Tops → Kimono Cardigans
- Women’s Tops → Hanfu Blouses Repeat as needed.
- Add categories on the same level
Hover over any existing row → click + Add same-level category to create another main or parallel group. - Edit
Hover → click the gear ⚙️ icon:- Change parent (move the category)
- Merge with another category (all products transfer automatically)
- Delete (only possible if the category is empty)
- Verify the structure Click the ☰ hamburger icon on any category to see all assigned SKUs. Empty = ready for new items.
Once the tree is built, every new product you add will automatically inherit the right category path for reporting, pricing tiers, and customs declarations.
You’re now ready to import your first supplier catalogs or create SKUs manually. Next step → go to Products → Items and start adding.
Exploring on our interactive guide here (step-by-step)
💡 If this doesn’t solve your issue or you have more questions, feel free to reach out through our [contact form]. We’ll get back to you within 2–3 business days.