Product Groups
Product Groups let you cluster related products together, making it easier to manage and analyze them as a set.
For example:
👉 If you sell clothing, you could make a group called “Shirts”.
All shirt products — cotton shirts, polo shirts, dress shirts — can be assigned into this group, even if they are in different categories or come from different suppliers.
This way, you can:
-
Quickly filter or report on all shirts.
-
Compare performance between groups (e.g., Shirts vs Pants).
-
Run promotions or analysis at the group level.
Product Catalog Overview
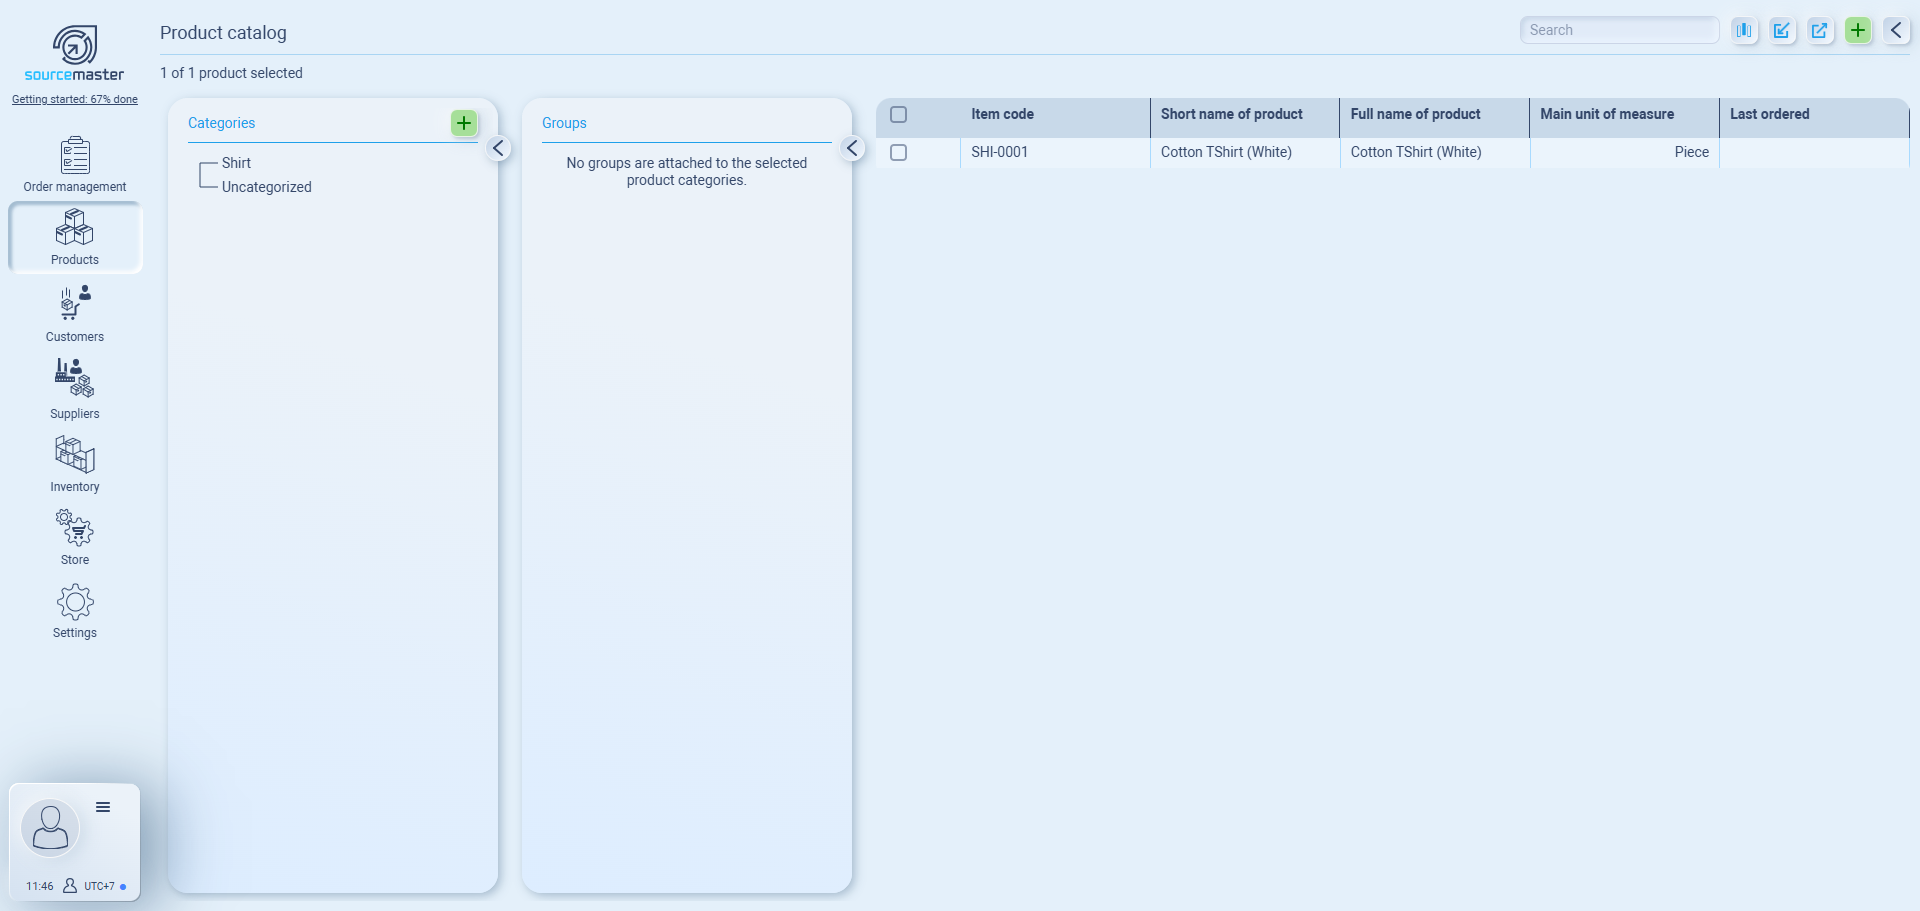
The catalog is where all your items live after creation. You can browse, filter, and manage them by category and group.
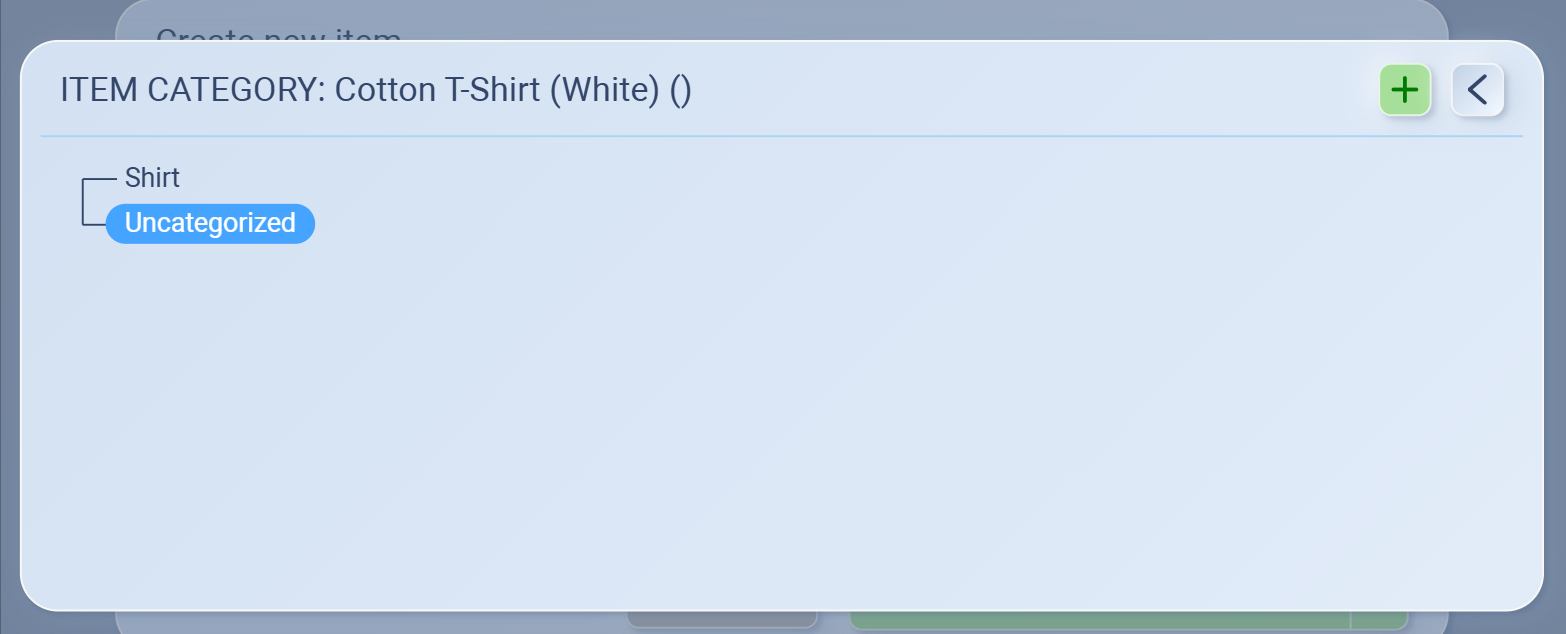
1. Categories panel (left)
-
Shows your defined product categories (e.g., Shirt).
-
Products must belong to a category — if not, they’ll appear as Uncategorized.
2. Groups panel (middle)
-
Shows product groups under the selected category (e.g., Cotton Products).
-
Currently, no groups are linked to “Shirt,” so this panel is empty.
3. Product list (right)
-
Displays all products matching your selected category/group.
-
Columns include:
-
Item code (auto-generated or custom)
-
Short name
-
Full name
-
Unit of measure
-
Last ordered
-
Creating a new group
Now the new group will appear in your directory.
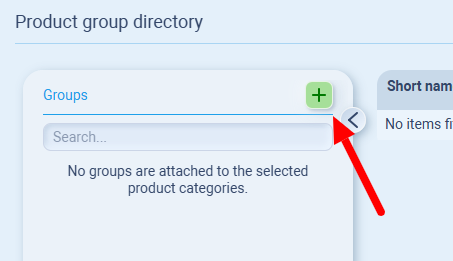
Create a Group
-
From Products → Product Groups, click ➕ Add.
-
Enter a group name (e.g. Cotton Products).
-
Click Add to save.
The group will now appear in your directory.
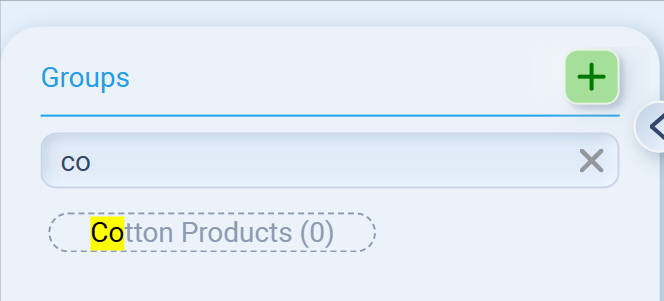
Filter by Group
Use the search bar to quickly filter and find products assigned to a group.
For example, typing “co...” will bring up Cotton Products.
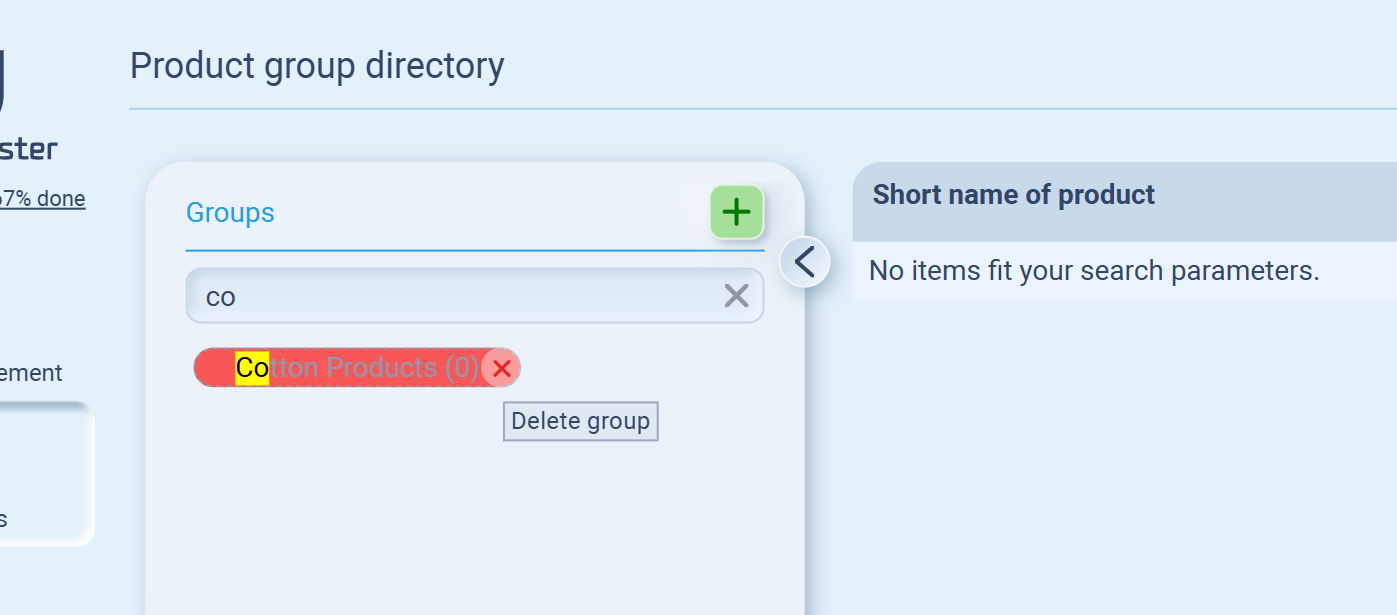
Delete a Group
Hover over a group, then click the red X to delete.
👉 Note: Deleting a group doesn’t delete the products inside—it only removes the grouping.
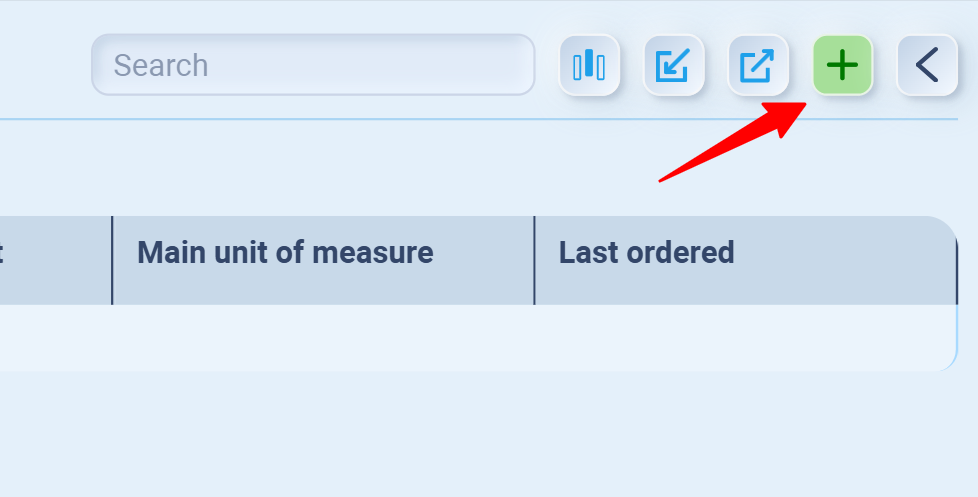
Creating a New Item (& Assigning products to a group)
To add a product into Sourcemaster:
-
From the Product List, click the green ➕ button (top right).
-
Fill in the details:
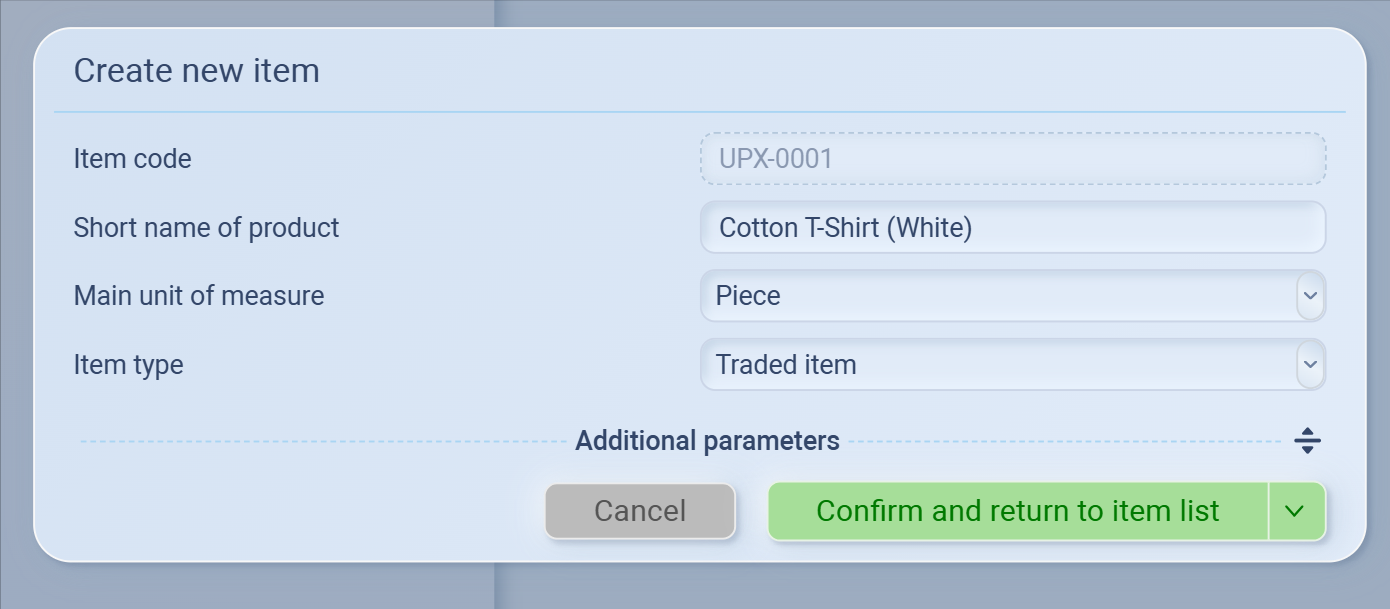
-
Item code – automatically generated (you can edit if needed).
-
Short name of product – e.g. Cotton T-Shirt (White).
-
Main unit of measure – choose how you track it (e.g. Piece, Box, Kg).
-
Item type – choose Traded item (for bought/sold goods) or Manufactured item.
-
-
Expand Additional parameters to:
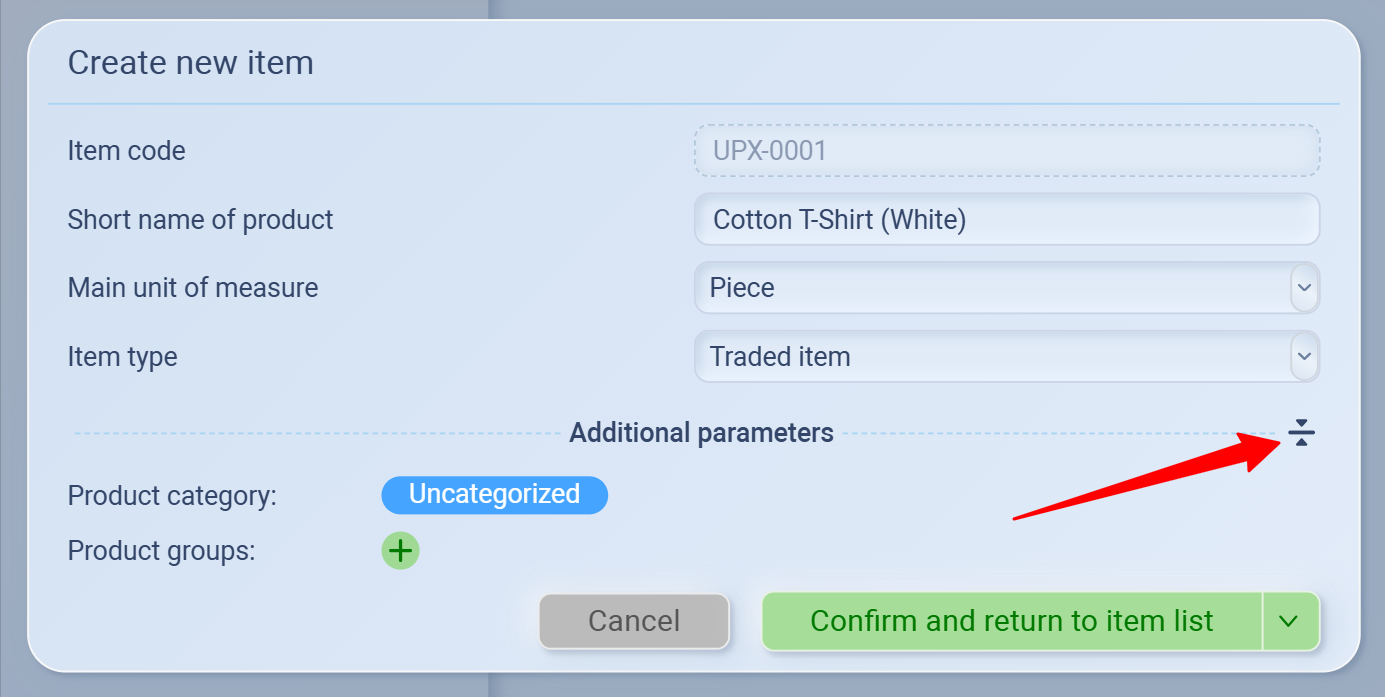 '
'

-
Assign a Product category (e.g. Shirts).
-
Assign a Product group (e.g. Cotton Products).
-
-
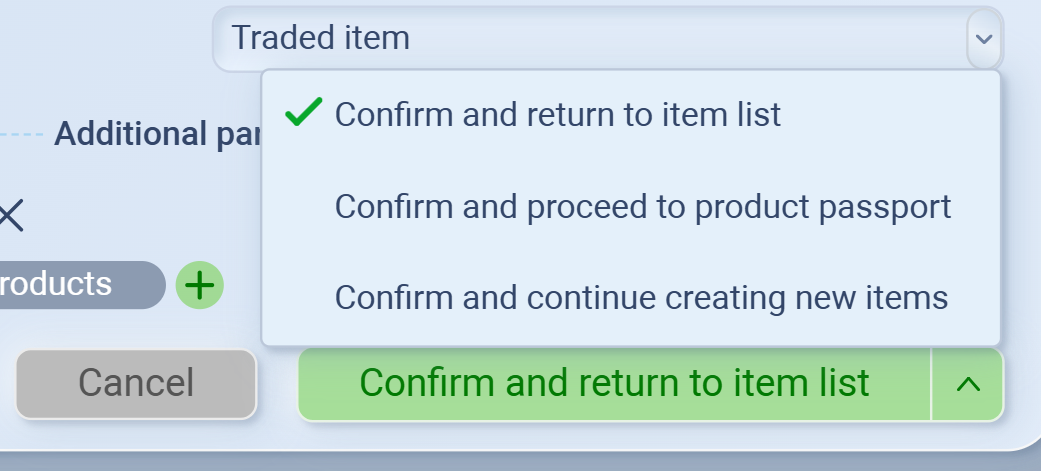
Click Confirm and return to item list to save.
-
When you finish filling in the item details, click Confirm. You’ll see three options:
-
Confirm and return to item list – Save the item and go back to the full product list.
-
Confirm and proceed to product passport – Save and continue to the product’s detailed info page (for adding specs, images, certificates, etc.).
-
Confirm and continue creating new items – Save this item and immediately start adding another one (useful for bulk entry).
For most cases, use Confirm and return to item list.
-
-
Managing Products in Catalog
You can organize, edit, or remove items directly from the Product Catalog.
How to manage items
-
Select a Category → Choose the category from the left panel to view all products inside.
-
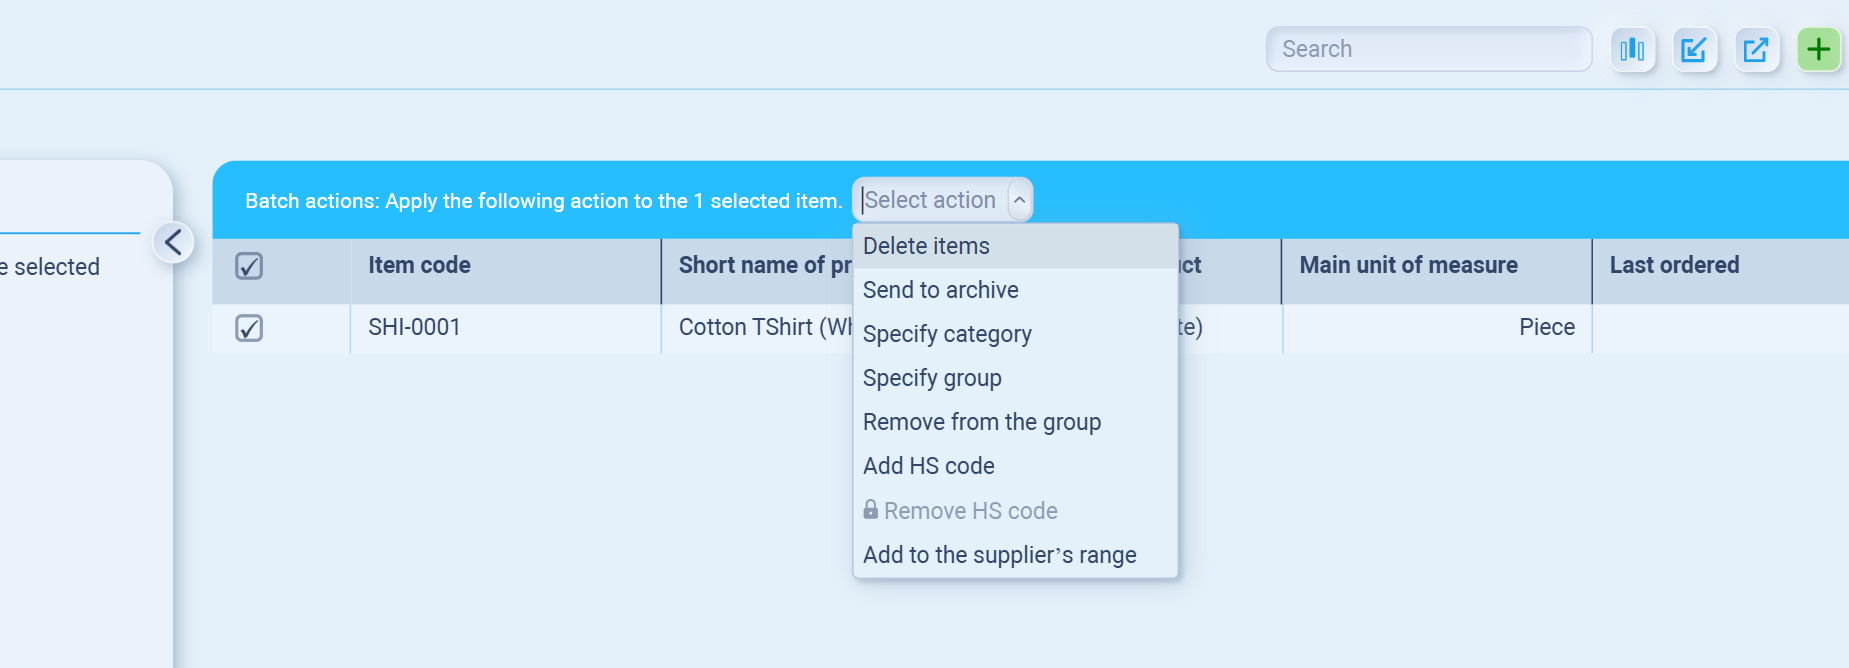
Select Products → Check the box next to individual products, or check the box in the header row to select all.
-
Batch Action Bar → Once products are selected, a blue banner appears at the top with a dropdown menu.
-
Choose an Action (options include):
-
Delete items – permanently remove.
-
Send to archive – hide from active use but keep record.
-
Specify category – move products into another category.
-
Specify group – assign products to a product group.
-
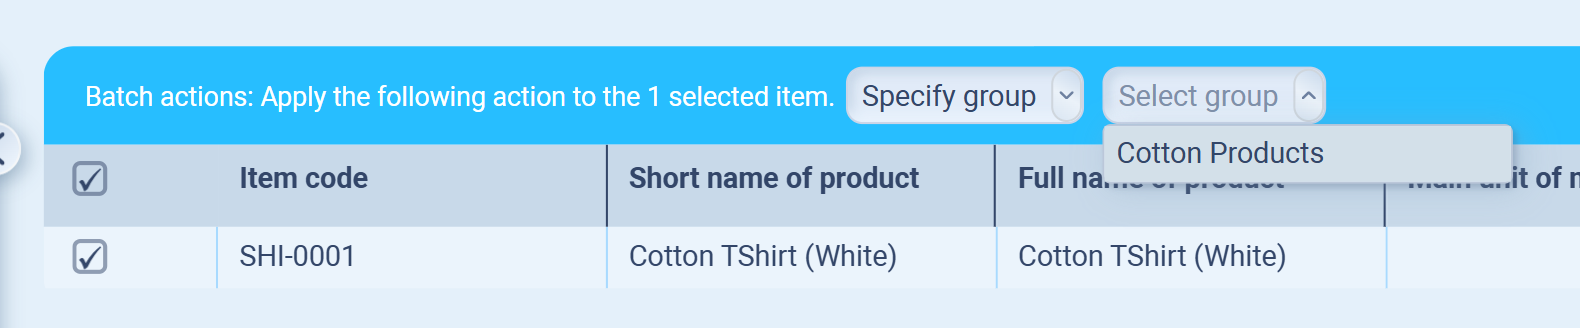
From the Batch Action Bar, choose Specify group.
-
In the dropdown, pick the group (e.g., Cotton Products).
-
Confirm the action — the product(s) will now appear under the selected group.
-
-
Remove from the group – unassign from current group.
-
(Not available yet) Add HS code – attach customs/tariff codes.
-
Add to the supplier’s range – link products to suppliers.
-
This makes it easy to clean up your catalog or reassign items in bulk without editing them one by one.
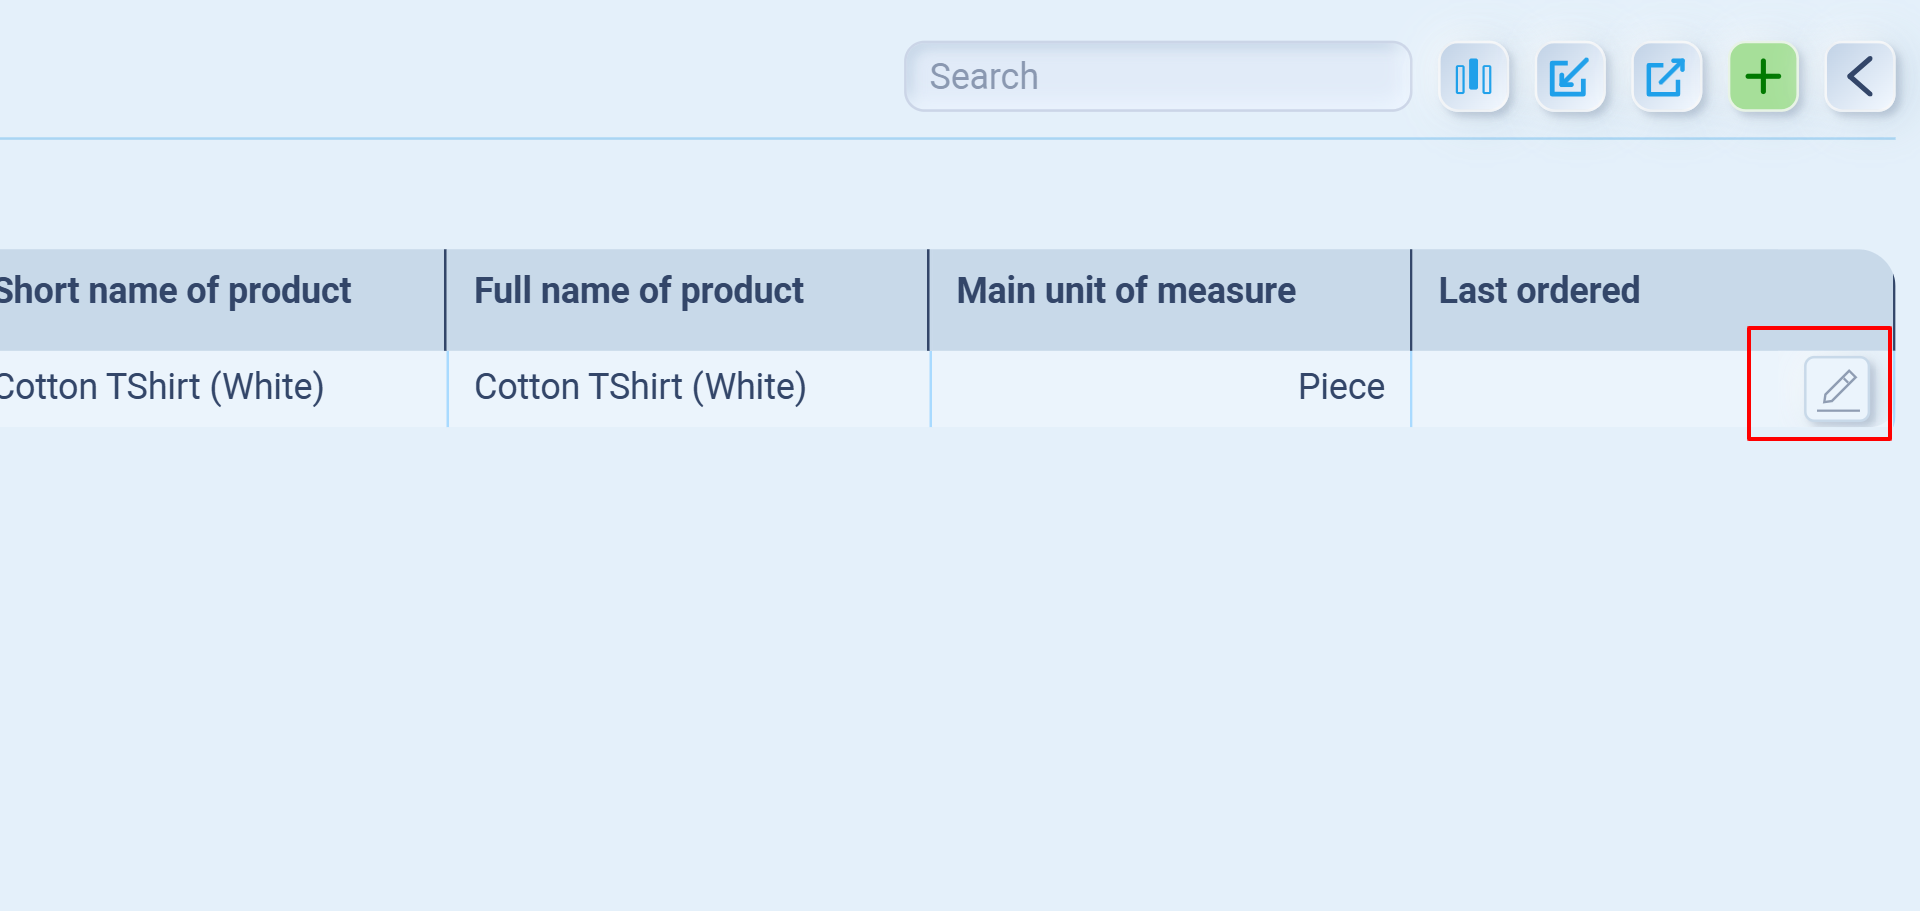
Last Ordered Date
This field shows the most recent time you purchased or received stock of a product.
To update it:
-
Go to the Product Catalog.
-
Find your product in the list.
-
On the right-hand side, click the pencil/edit icon under the Last ordered column.
-
In the Product passport page that opens, scroll to Characteristics.
-
Enter or adjust purchase/order details — once a Purchase Order (PO) is processed for this product, the Last ordered field updates automatically.
💡 You don’t need to edit this manually every time. It will usually auto-update when you confirm supplier POs involving the product.
In Product passport (Product profilE):
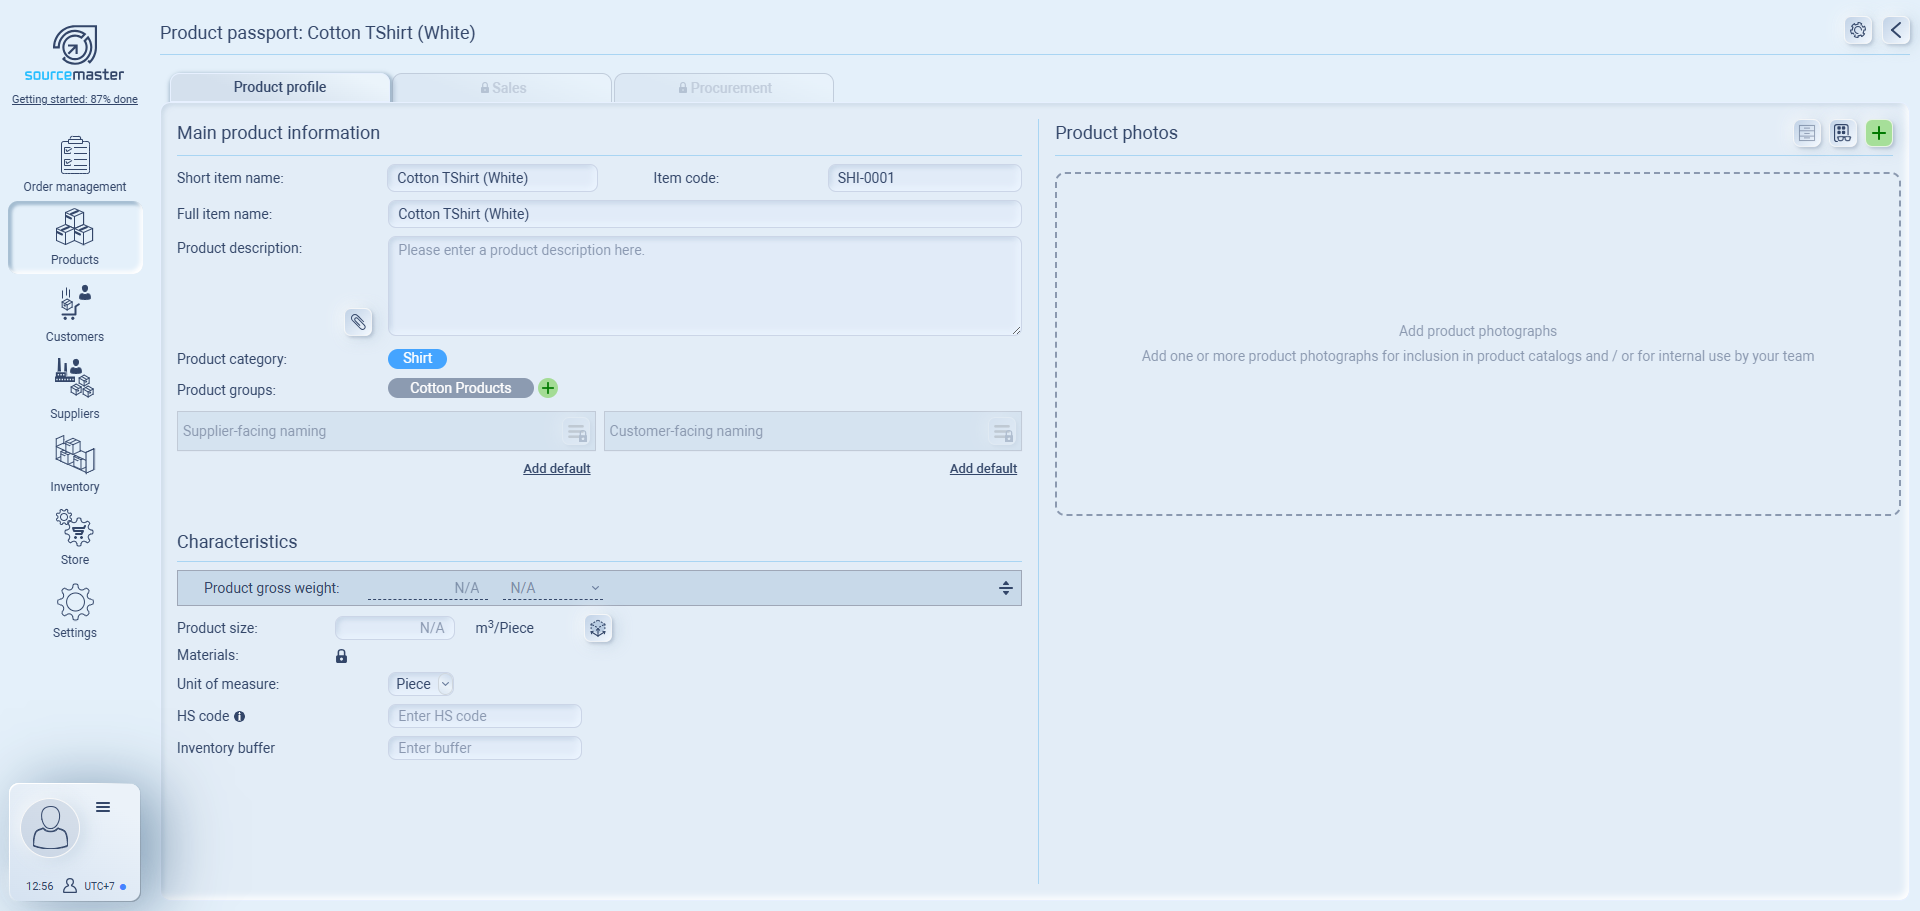
Main product information
-
Short item name: The quick identifier for your product (e.g., Cotton T-Shirt (White)). Used in lists and orders.
-
Full item name: The complete product name, often matching how it appears in catalogs.
-
Product description: Free text field for adding details such as material, style, or key features. Example: 100% cotton, lightweight, machine washable.
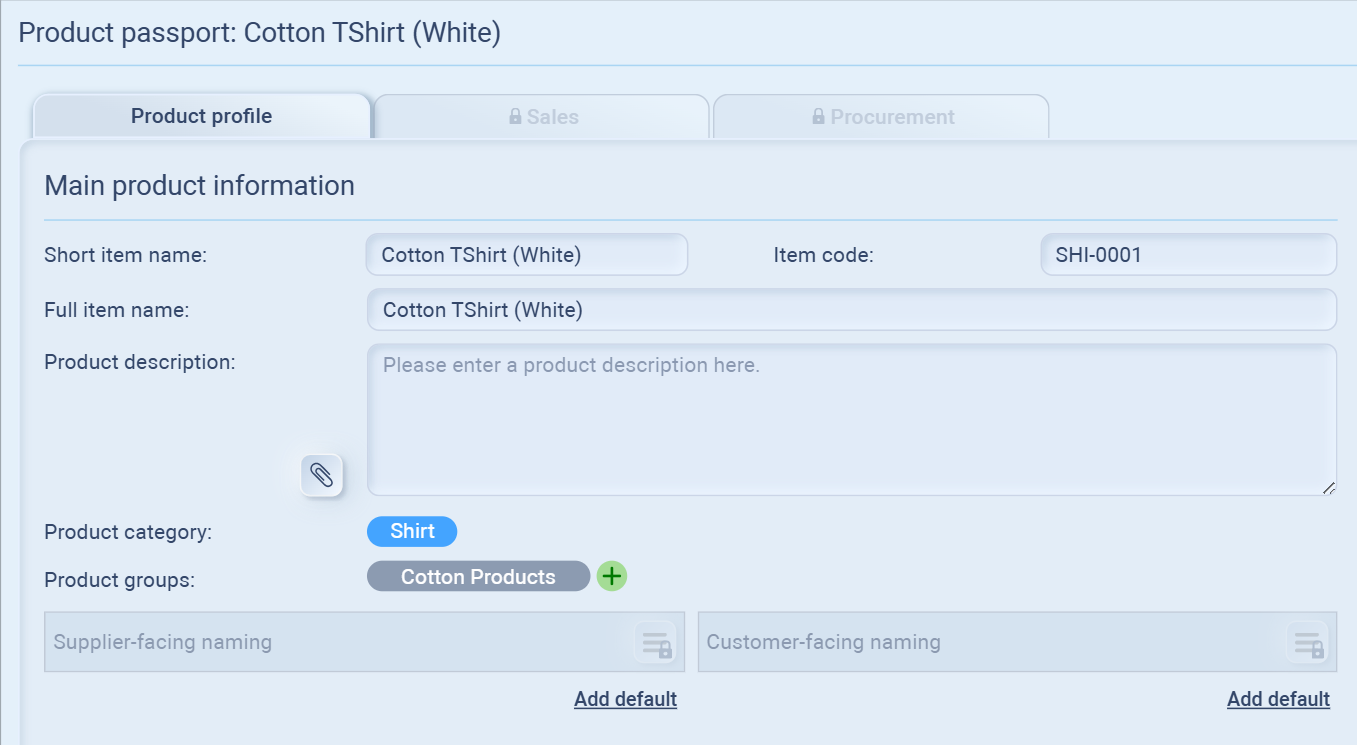
- If you click the 📎 clip icon, you can upload a description file (drag a file in or use the green + button). This is useful for technical sheets or detailed specifications.
- If you click the 📎 clip icon, you can upload a description file (drag a file in or use the green + button). This is useful for technical sheets or detailed specifications.
-
Product category: The main category your product belongs to (e.g., Shirt). Helps with organizing items.
-
Product groups: Secondary grouping across categories (e.g., Cotton Products). Useful for analysis or bulk actions.
-
Supplier-facing naming (optional): Internal or supplier-specific name, if it differs from your catalog name.
-
Alternative code or name used only with suppliers, if it differs from your catalog name.
Example:-
System Name: Cotton T-Shirt (White)
-
Supplier Alias: CT-WH-01
-
-
-
Customer-facing naming (optional): Alternative label shown in a B2B store or client-facing interface.
-
Alternative code or name for customer catalogs or B2B stores.
Example:-
System Name: Cotton T-Shirt (White)
-
Trade Alias: Classic White Tee
-
-
Why it’s necessary to set Supplier/Customer-facing naming?
Supplier-facing and customer-facing naming are mainly for obfuscation, letting you hide your internal codes or naming when sharing with suppliers or customers. This protects your product strategy, avoids exposing system structures, and keeps flexibility so each audience sees the right name while everything still links back to the same item.
For example: Your system might use SHI-0001 Cotton T-Shirt (White), but you don’t want suppliers or customers to see that structure.
→ Instead, you show them a supplier alias (CT-WH-01) or a customer alias (Classic White Tee).
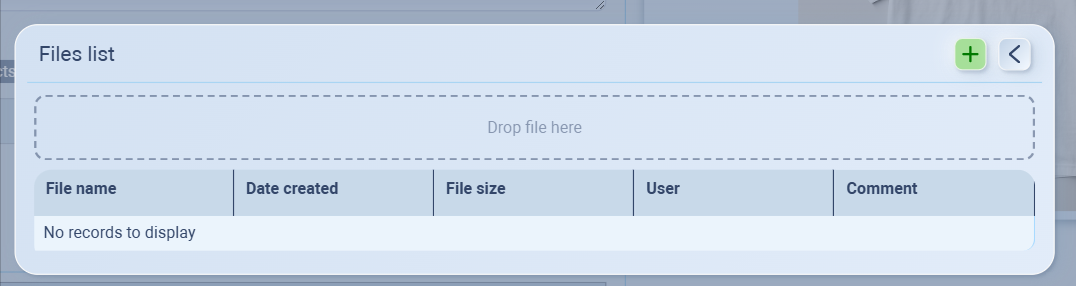
Characteristics
-
Product gross weight: Total weight per unit including packaging (helps in shipping & freight calculations).
-
Product size: Volume or dimensions per unit (m³/Piece). Useful for storage and container planning.

-
Click the cube icon next to Product size to estimate the item’s volume. This is used for container loading and freight estimation.
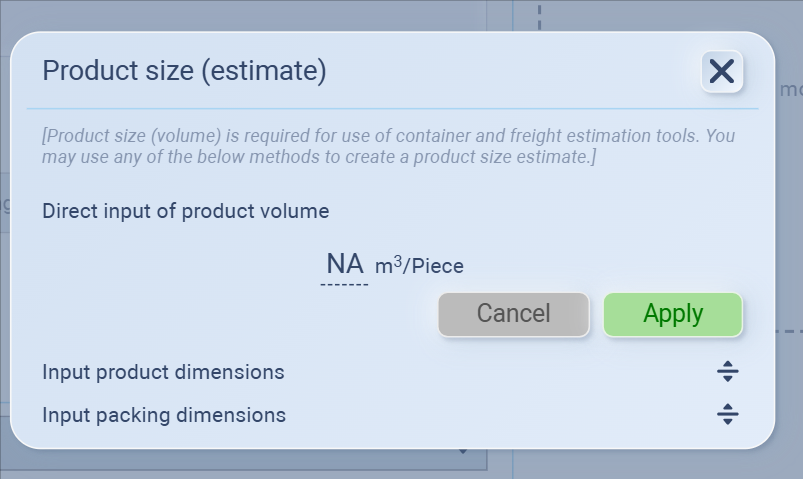


You can enter the size in three ways:
-
Direct input of product volume
-
Example: If you already know a T-shirt box takes up 0.02 m³ per piece, type 0.02.
-
-
Input product dimensions (length × width × height)
-
Example: A carton is 50 cm × 40 cm × 20 cm.
Calculation: 0.5 × 0.4 × 0.2 = 0.04 m³ per piece.
-
-
Input packing dimensions (pack size and pieces per pack)
-
Example: A carton measures 60 × 40 × 40 cm and contains 20 T-shirts.
Total volume: 0.06 × 0.40 × 0.40 = 0.096 m³.
Per piece: 0.096 ÷ 20 = 0.0048 m³/piece.
-
Hit Apply to save.
-
-
-
Materials: Field for recording key material(s). Helps in compliance and product details.
-
Unit of measure: How you count the product (e.g., Piece, Box, Kg). Essential for stock management.
-
HS code: Harmonized System code for customs & international trade compliance.
-
Inventory buffer: Minimum stock level you want to keep on hand. If inventory falls below this, the system can alert you or highlight shortages.
Product Photos
You can upload images to make your products clear and recognizable in catalogs and internal use.
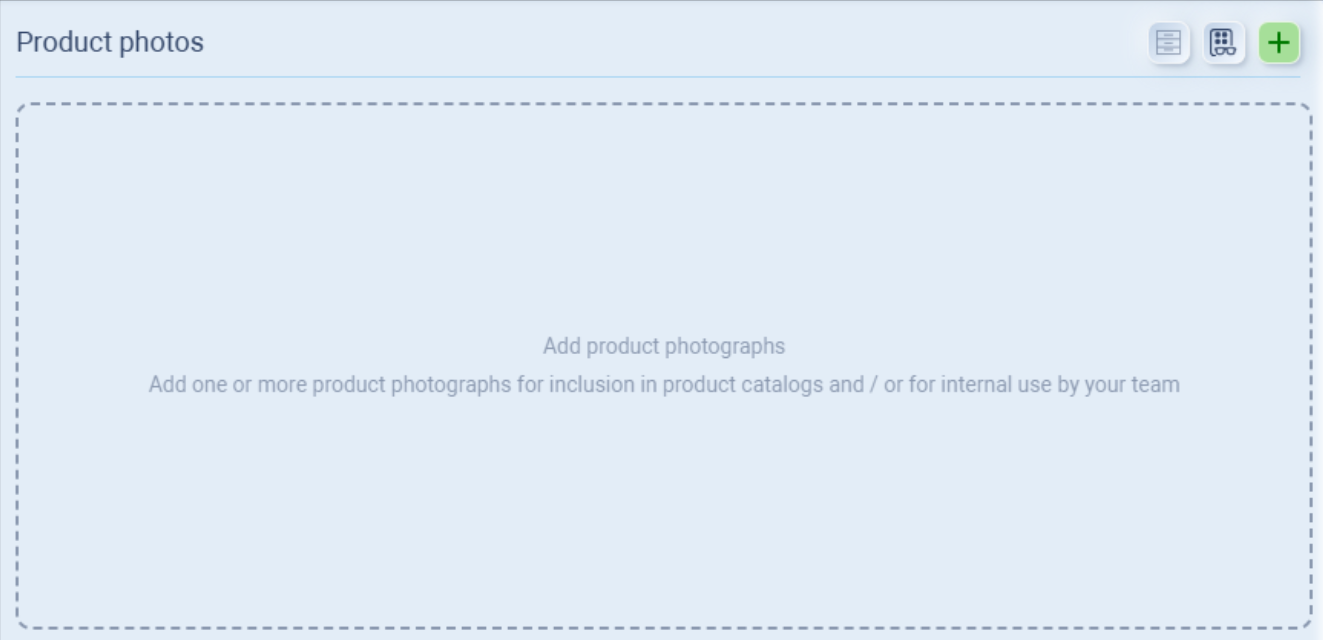
-
Add photos
-
Either drag files directly into the box or click the + button to upload.
-
-
View photos
-
Uploaded images will appear in the showcase list on the right.
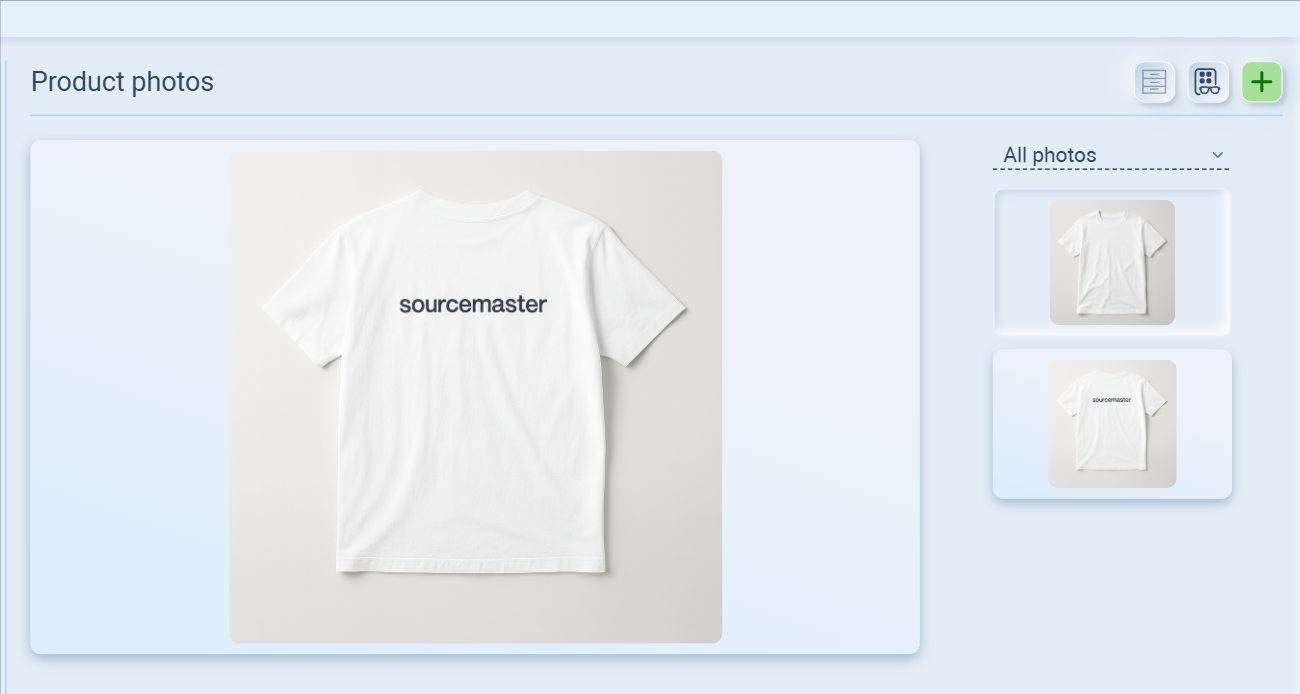
-
Click on any image to view it in the main display.
-
-
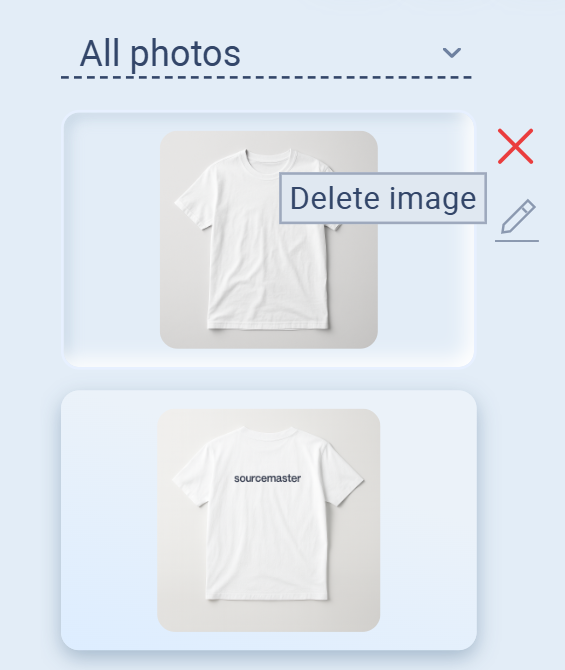
Manage photos
-
To add more, repeat the upload process.
-
To delete an image, hover over it in the list and click the red X.
-
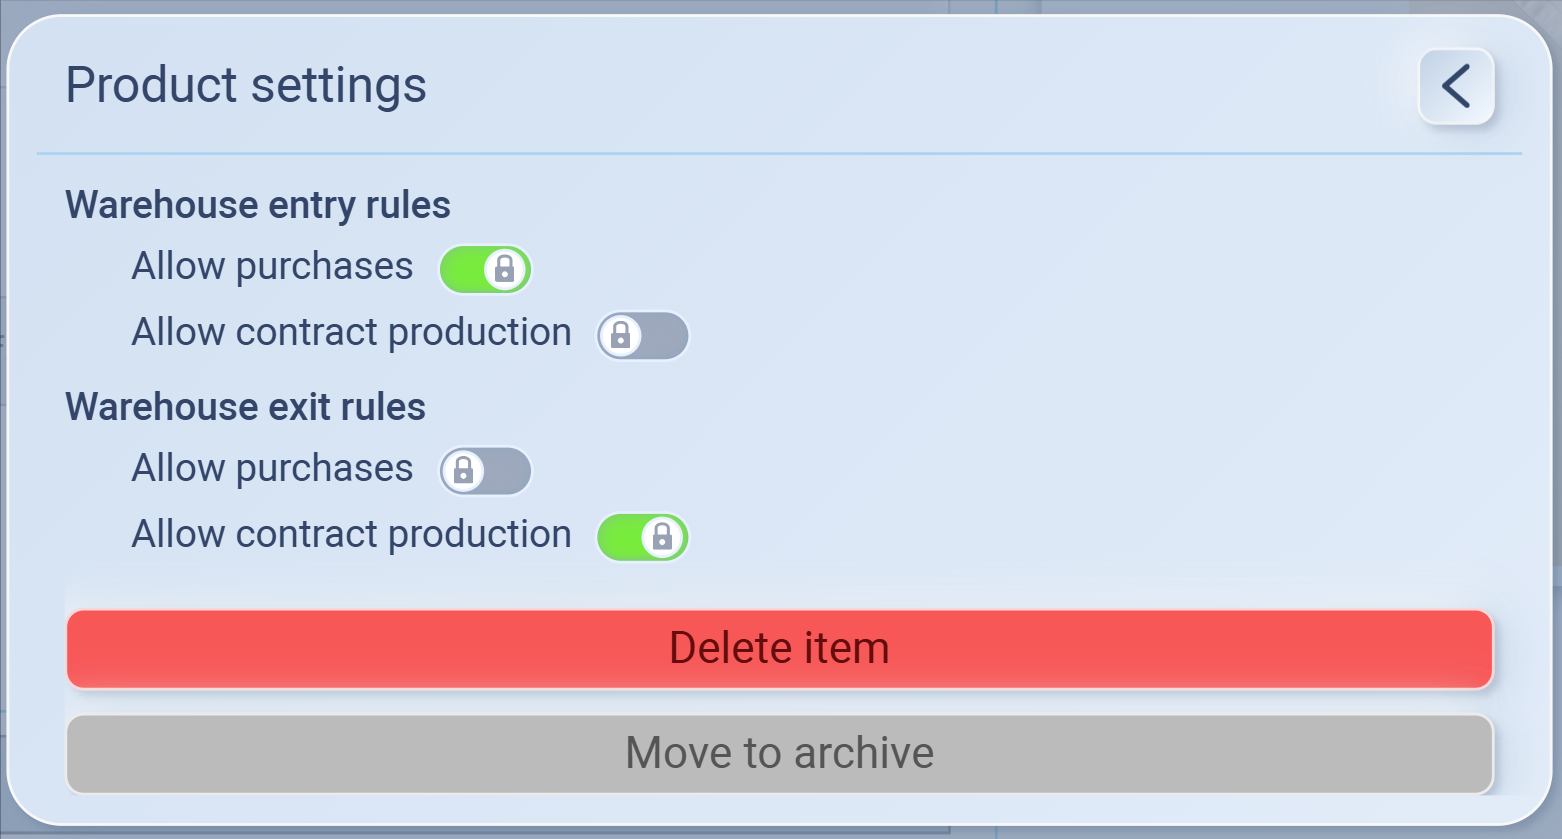
Product Settings
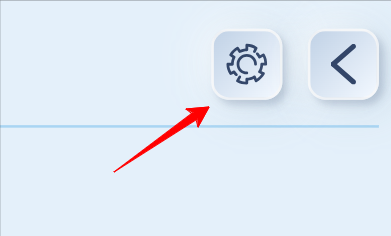
Click the settings icon (⚙) at the top-right of the product profile to open Product Settings.
Here you can manage:
-
Warehouse Entry Rules
-
Allow purchases: Enable/disable whether this product can be bought into your warehouse.
-
Allow contract production: Control if the product can be entered through contract production.
-
-
Warehouse Exit Rules
-
Allow purchases: (Locked) Controls if the product can be sold directly from warehouse.
-
Allow contract production: Allow this product to exit warehouse for contract production.
-
-
Item Actions
-
Delete item: Permanently remove the product from the system.
-
Move to archive: Store the product in archive (not deleted, but hidden from active use).
-
Product Catalog – Additional
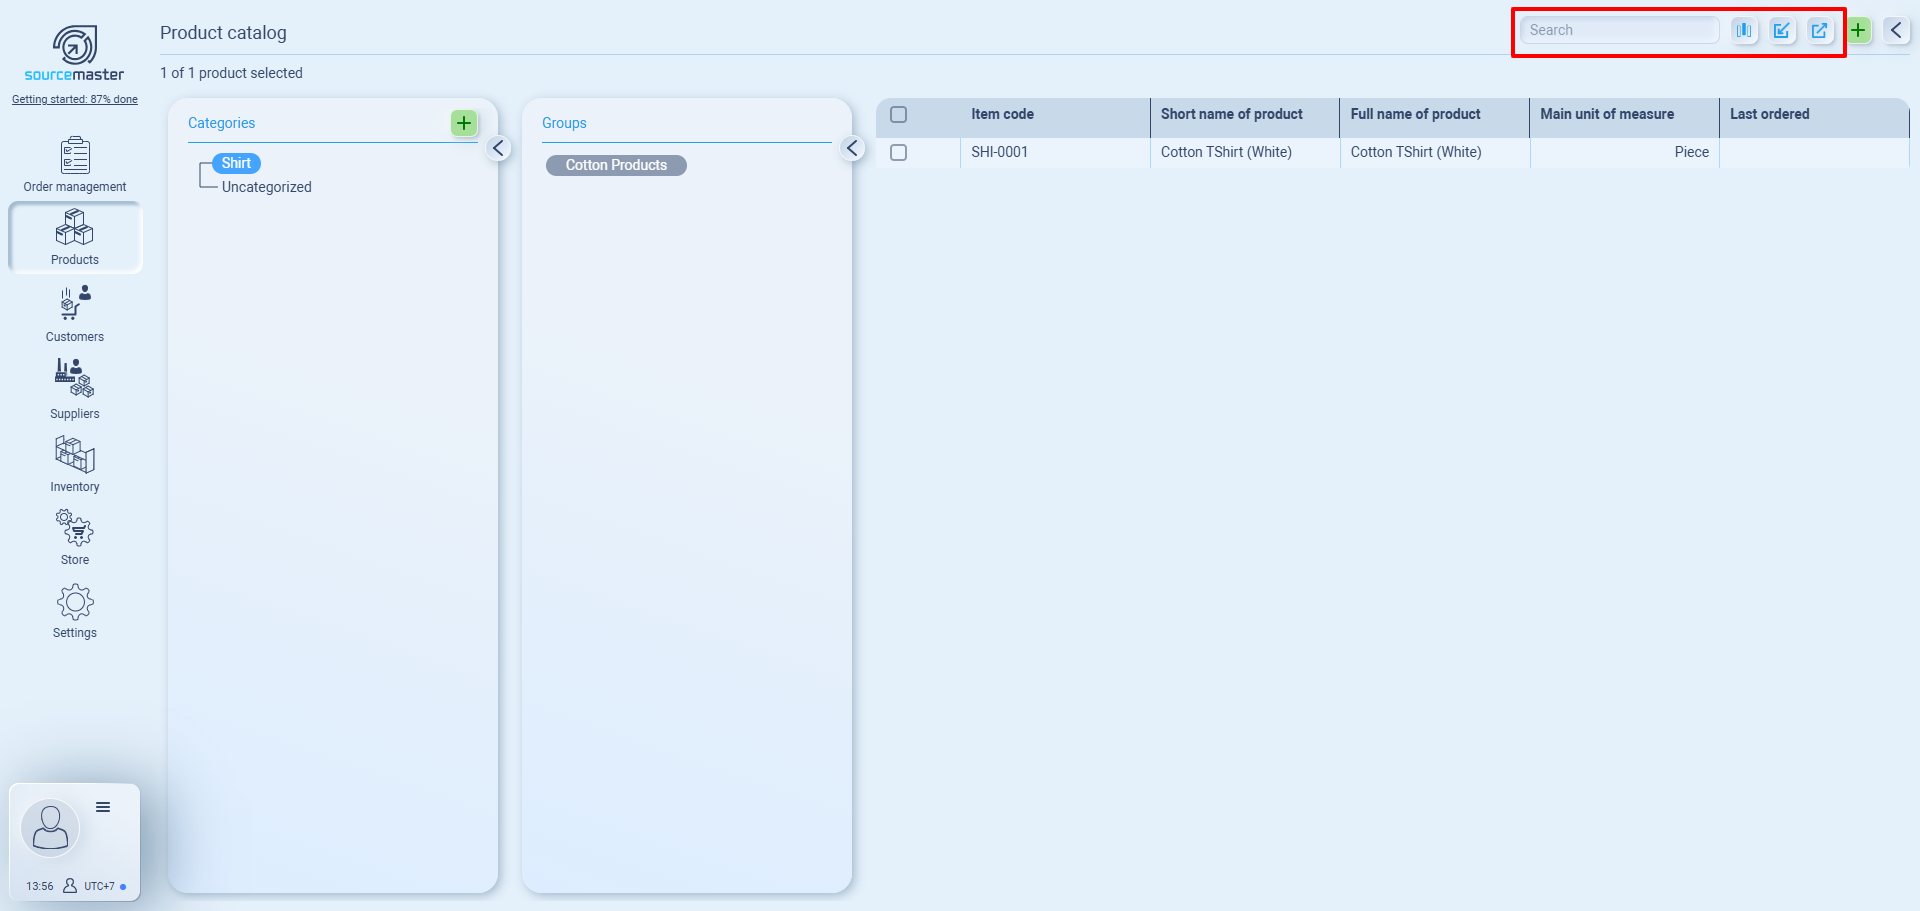
Along with browsing by categories and groups, the catalog view includes several tools to help you manage and organize items:
-
Search Box – Quickly find any product by typing its code, name, or keyword.
-
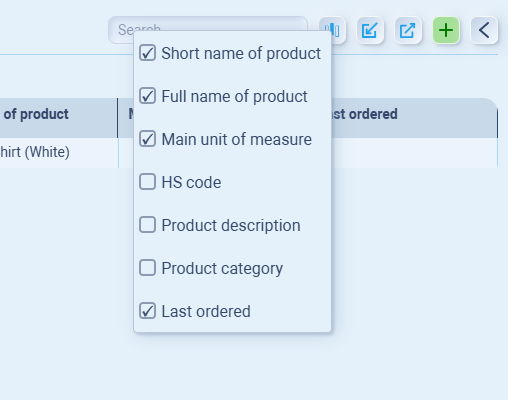
Column Management Menu – Choose which product details to display (e.g., name, unit, category, last ordered). Toggle them on/off depending on what matters to you.
-
Import (XLSX) – Bulk-upload items from a spreadsheet file. Useful if you have a large catalog to set up at once.
-
Export (XLSX) – Download your catalog data to Excel. This helps with backups, reporting, or sharing with your team.
💡 If this doesn’t solve your issue or you have more questions, feel free to reach out through our [contact form]. We’ll get back to you within 2–3 business days.