Step 4: Review Pricing Details
Pricing Details
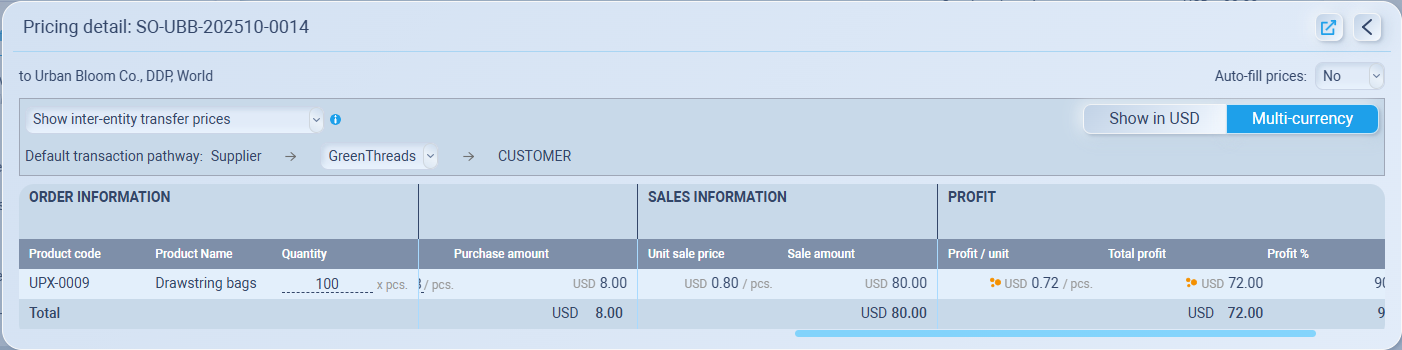
The Pricing Detail window shows a full breakdown of your order’s buying and selling flow — how much you buy from suppliers, how much you sell to customers, and what profit (or loss) is made in between.
It helps ensure your selling prices, margins, and transfer pricing (if any) are accurate and transparent.
Think of it as the financial flow of your order:
Flow Meaning Example Supplier → Your company Purchase side — how you buy goods Guangzhou Cottonworks sells to GreenThreads Your company → Customer Sales side — how you sell goods GreenThreads sells to Urban Bloom Co. So when you open Pricing Detail, Sourcemaster shows:
Who sells to whom
What pricing method applies between them (manual, cost-plus, fixed margin, etc.)
How costs, transfer prices, and profit are distributed through the path
To open Pricing detail, click the three-line icon (≡) on the Ordered goods section.
What You’ll See Here
When you open Pricing Detail, you’ll see:
-
The product details (code, name, quantity, etc.)
-
Purchase price – how much you buy from your supplier
-
Sales price – how much you sell to your customer
-
Profit or margin between each step
In default, you’ll usually see a transaction pathway like this:
Supplier → Your company → Customer
This already includes your supplier cost, customer price, and profit automatically
View Modes
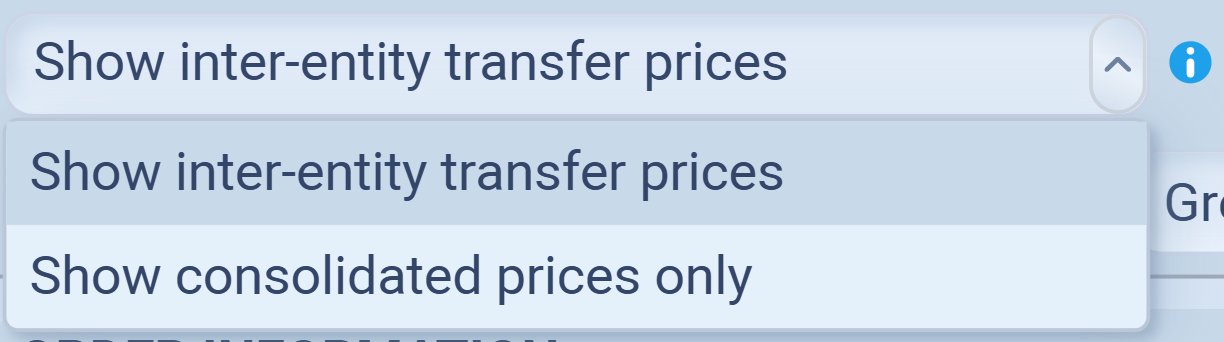
You can switch between two display modes:
-
Show inter-entity transfer prices — Displays all transaction layers between supplier, intermediaries, and customer.
-
Show consolidated prices only — Combines all layers into a single customer-facing price.
Transaction Pathway
Below the pricing mode, you’ll usually see the default transaction flow, for example: Supplier → your company → Customer

This means your trade path runs from an external supplier, through your company, to an external customer — which is the most common setup, also called a Single-entity model.
Single-Entity Model
Your company handles both buying and selling in one flow.
Example: Chinese supplier → Your company (in Bangkok) → US customer
In this case, you don’t need to add any extra entities.
The system already:
-
Shows supplier cost and customer price automatically
-
Tracks your margin between the two
-
Lets you open the transaction window anytime to review cost and price consistency
So if you only operate under one legal company, you’re already good to go — no extra setup needed.
Multi-Entity Model
If your business has more than one internal company (for example, a sourcing branch, trading company, or sales office under the same group), you can map those internal transfers here.
Example: Chinese supplier → Your company (in Bangkok) → Your company (in US) → US customer
In this case, you’ll need to add or adjust intermediate entities (for example, a Hong Kong sourcing branch or a U.S. distribution office).
This makes your internal pricing and profit tracking accurate across multiple companies
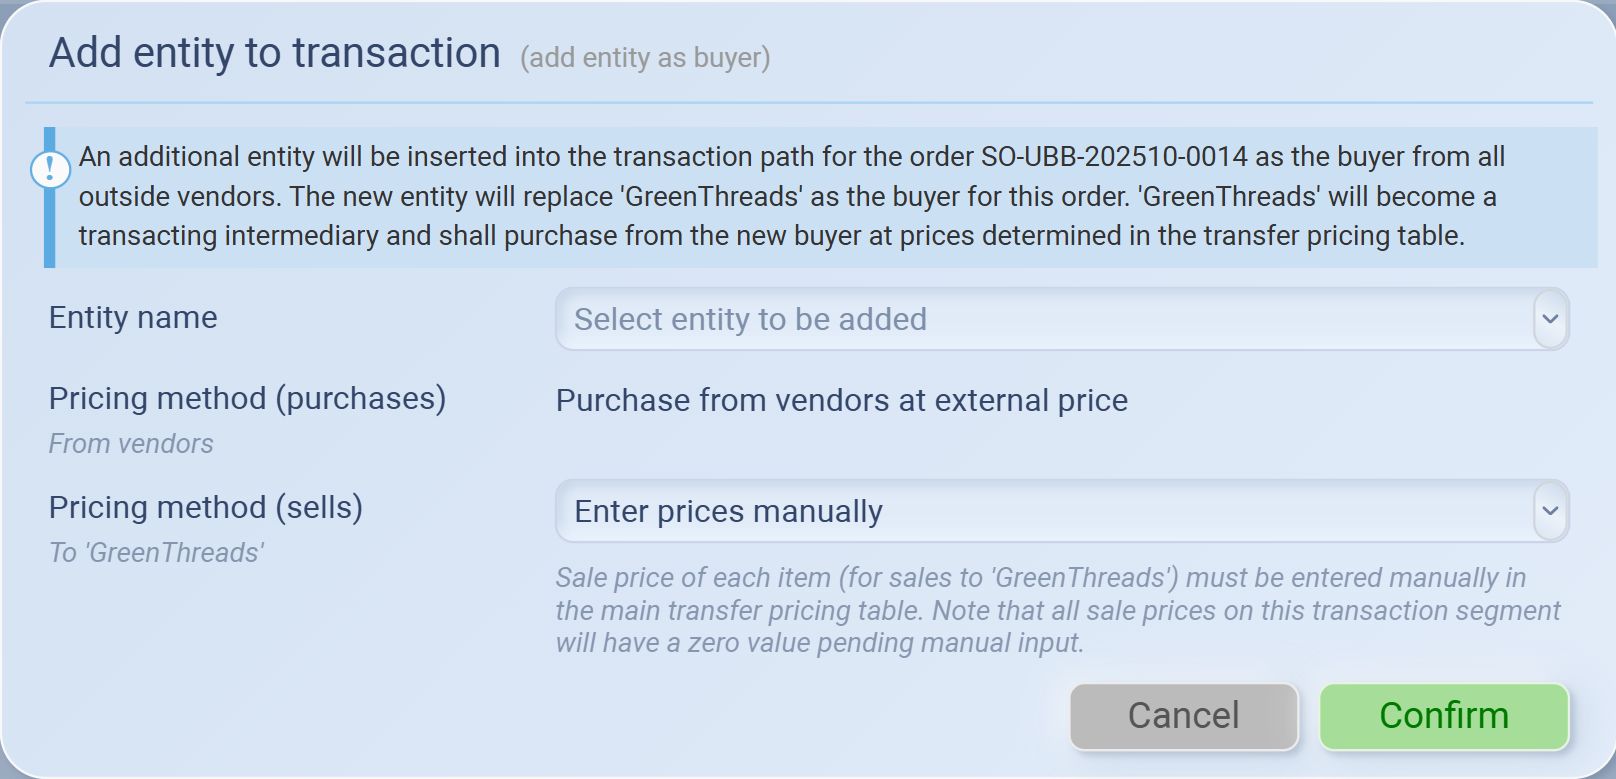
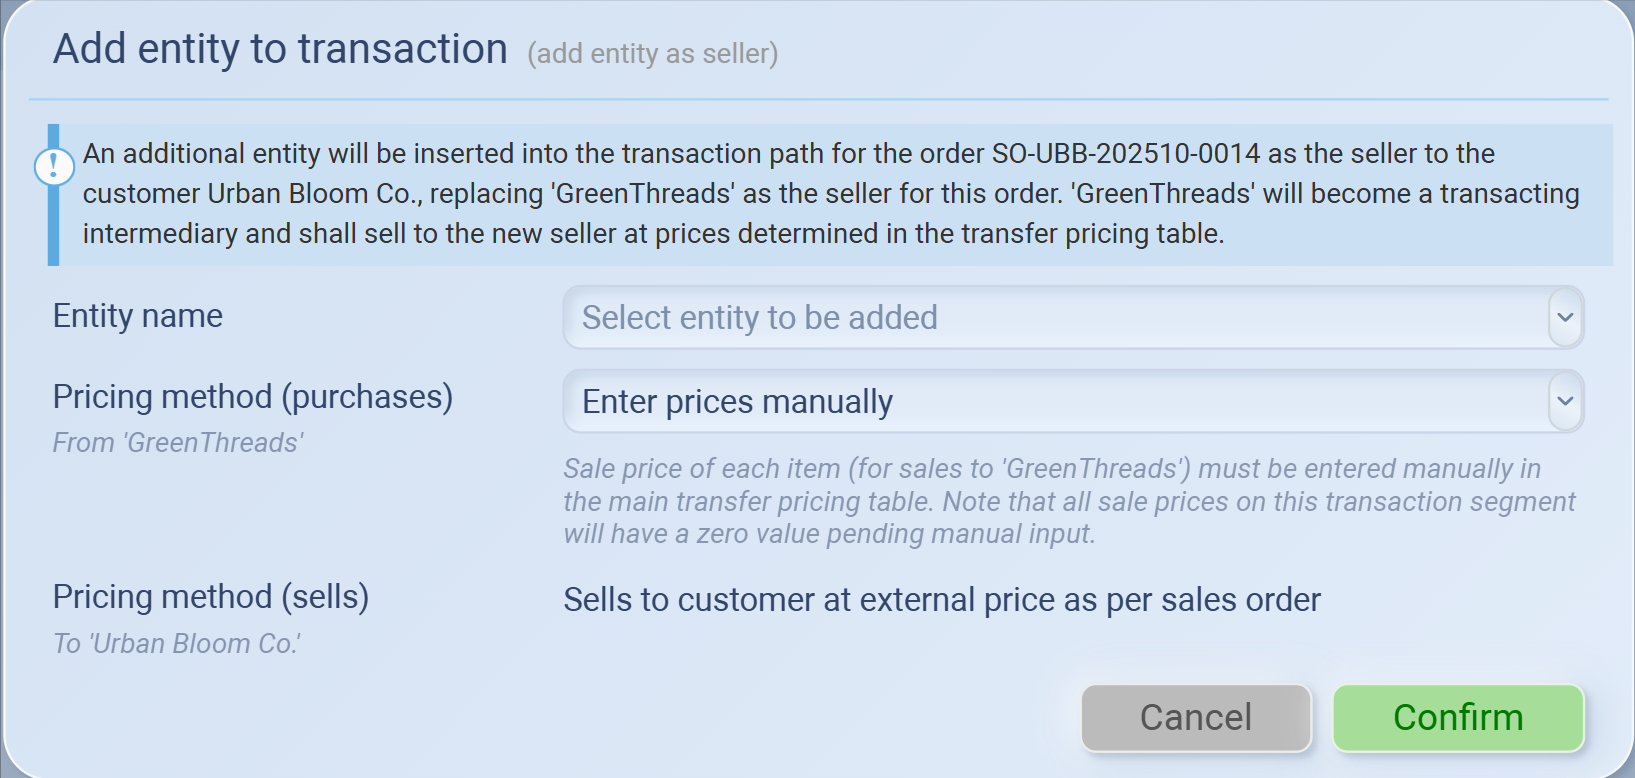
How to Add an Entity
You can insert new entities directly into the transaction pathway:
Hover between two entities** in the pathway — the system will highlight where the new entity will be inserted.
Click ➕ Add Entity between entity:
If inserted between a supplier and your trading company, it acts as a buyer.
If inserted between your trading company and a customer, it acts as a seller.
A popup window appears (the system automatically determines whether it’s added as a buyer or as a seller based on where you clicked).
Select:
Entity name – choose the company you want to insert.
Pricing method (purchases) and Pricing method (sells) – define how the entity’s internal buy/sell prices are calculated (e.g., External purchase price, Cost plus, Fixed resale margin, etc.).
Click Confirm to save.
Once confirmed, the new entity appears in the pathway, and the pricing table below updates with the revised purchase, sale, and profit details for each step.


💡 If this doesn’t solve your issue or you have more questions, feel free to reach out through our [contact form]. We’ll get back to you within 2–3 business days.