Pricing Groups
Pricing Groups let you set predefined price sets for products or services. These groups can then be applied directly to sales orders, catalogs, and other company documents, making pricing more consistent and faster to manage.

How to Manage Pricing Groups
-
Open Pricing Groups
-
Go to Customers > Pricing Groups from the dashboard.
-
You’ll see a list of all pricing groups with details like status, validity, items included, and rules.
-
-
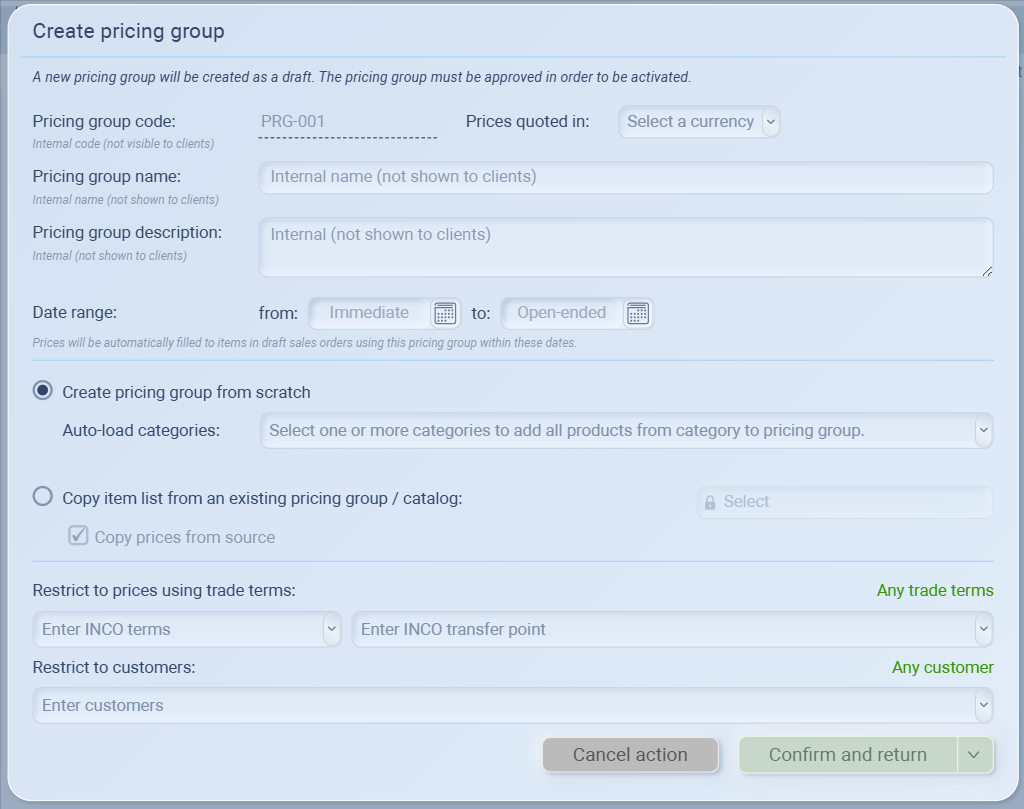
Create a New Pricing Group
-
Click the “+” button on the top right.
-
Fill in Group Details
-
Pricing group code: Automatically generated (internal use only).
-
Currency: Select the currency in which prices will be quoted.
-
Pricing group name: Internal name for reference (not visible to clients).
-
Description: Add an internal note to describe the group.
-
-
Set Date Range
-
Choose Immediate (default) or a custom start date.
-
Set an end date or leave it Open-ended for ongoing use.
-
-
Choose How to Build the Group
-
Create from scratch: Add products manually or auto-load them from categories.
-
Copy from existing: Duplicate items from another pricing group or catalog (you can copy prices as well).
-
-
Apply Restrictions (Optional)
-
Trade terms: Restrict the group to specific Incoterms (e.g., FOB Shanghai).
-
Customers: Restrict the group to specific customers only.
-
-
Save
-
Click Confirm and return to save your pricing group as a draft.
-
Note: A draft must be approved before it becomes active.
-
-
-
-
Assign to Customers or Catalogs
-
Once created, the pricing group can be assigned to customers or linked to catalogs for automatic use in orders.
-
-
Edit or Delete
-
You can update a pricing group at any time (e.g., change item pricing, extend validity).
-
Outdated groups can be deactivated or removed.
-
Example: Creating a Pricing Group
Imagine you’re working with your client EcoThreads, a sustainable apparel retailer in the US. They want a special summer deal on your cotton T-shirts. Instead of manually adjusting prices for every order, you set up a Pricing Group.
You go to Customers > Pricing Groups and click the + button.
You name the group “Summer Promo – Cotton Shirt” (internal only, EcoThreads won’t see this).
You set the currency to USD and the validity period from June 1st to August 31st, 2025.
Under trade terms, you choose FOB Bangkok, since EcoThreads prefers to handle their own shipping.
You add the White Cotton T-Shirt to the group, priced at a discounted rate for this promotion.
Finally, you restrict this pricing group to EcoThreads only, so no other customer can access these prices.
Now, every time EcoThreads logs in to place an order during summer, they’ll automatically see the special promo pricing—no extra emails, no manual updates, no confusion.
Viewing Products in a Pricing Group
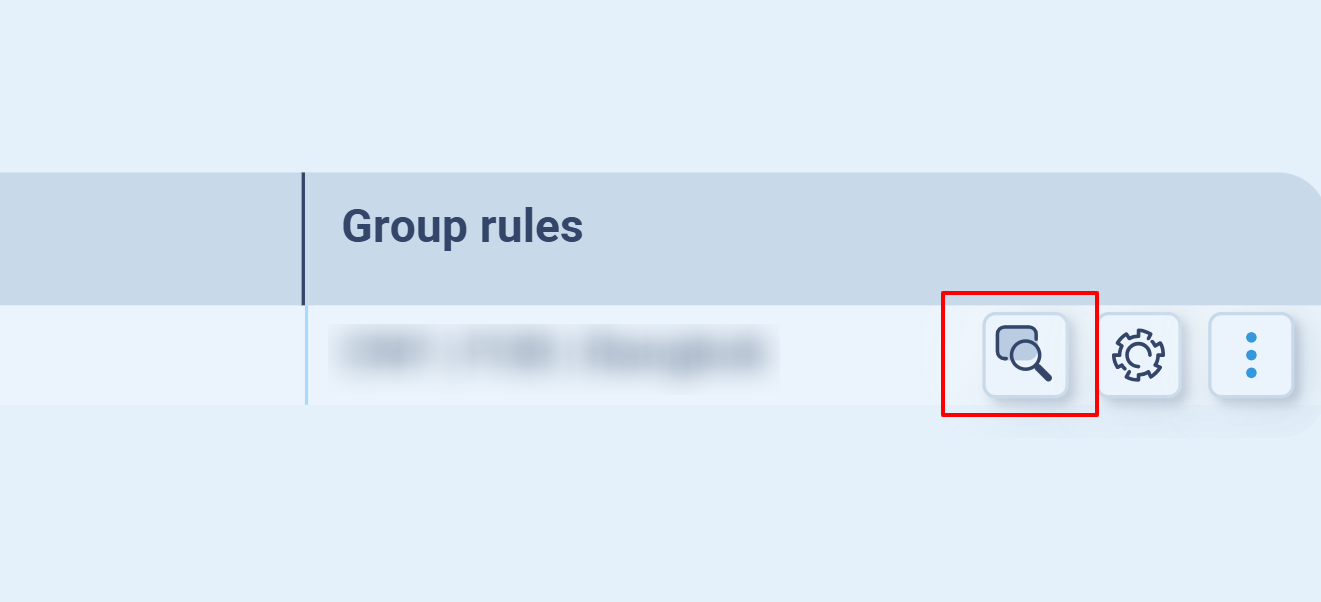
Once you’ve created a pricing group, you can review which products are included:
-
Go to the Pricing Groups list.
-
Locate your group, then click the magnifying glass icon under Group rules.
-
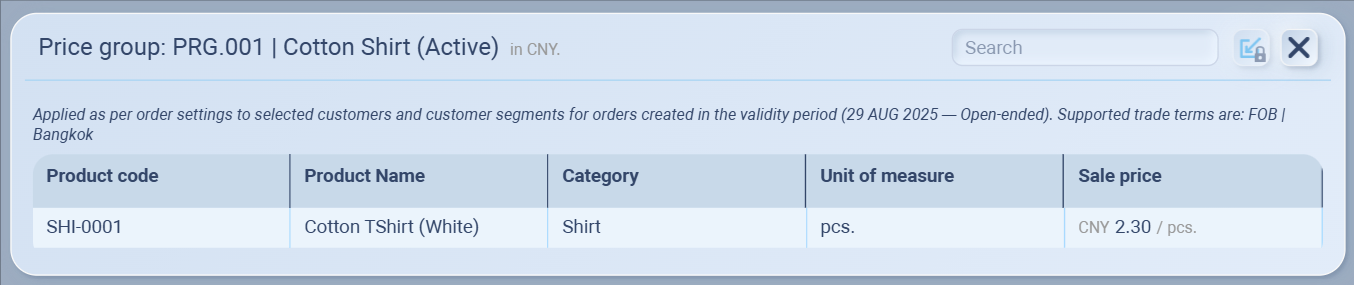
A detailed view will open showing:
-
Product code
-
Product name
-
Category
-
Unit of measure
-
Sale price
-
This makes it easy to confirm all items, prices, and rules applied to the group.
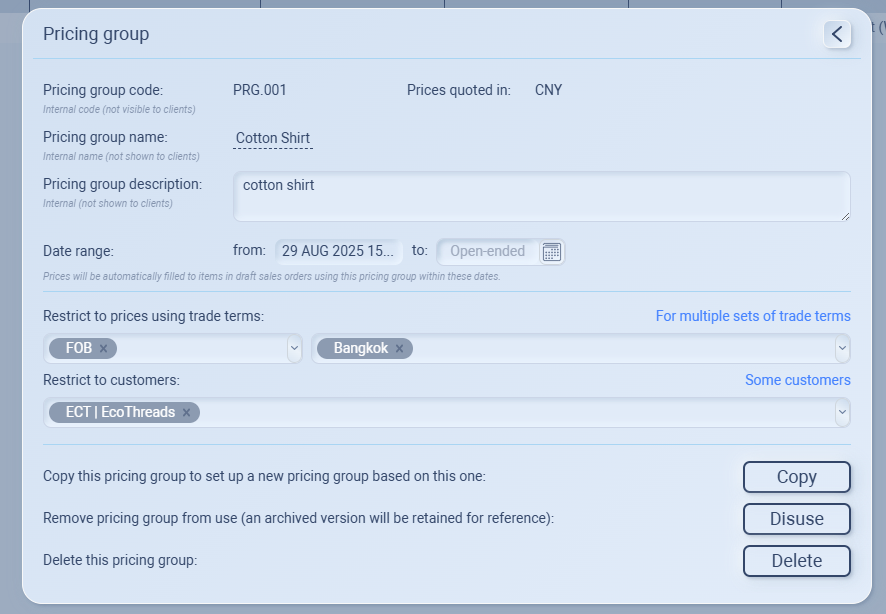
Pricing Group Settings
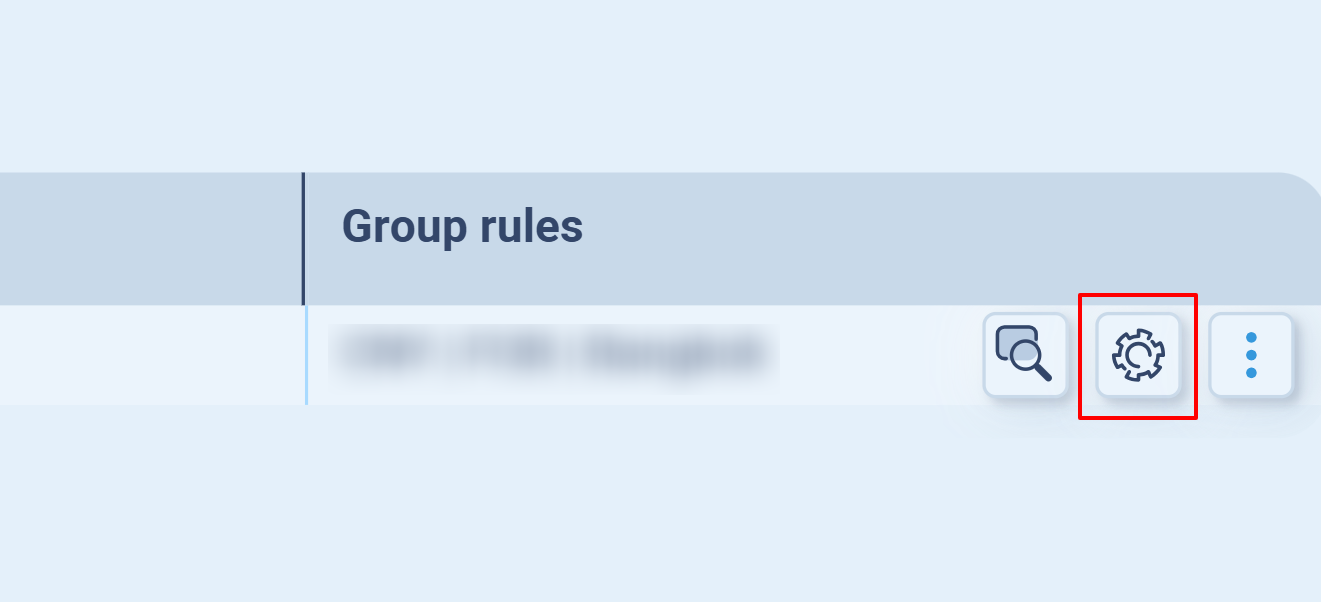
Once a pricing group is created, you can manage or update its details from the settings panel (⚙️ icon). Here you can:
-
View and edit details: Update the group’s name, description, or date range.
-
Restrict by trade terms: Limit the group to specific trade terms (e.g., FOB | Bangkok).
-
Restrict by customers: Apply the group only to selected customers (e.g., EcoThreads).
-
Copy: Duplicate this pricing group to quickly set up a similar one.
-
Disuse: Archive the pricing group so it can’t be used in new orders (kept for reference).
-
Delete: Permanently remove the pricing group from the system.
This gives you full flexibility to control who can use the pricing group, under what terms, and for how long.
Quick Actions Menu
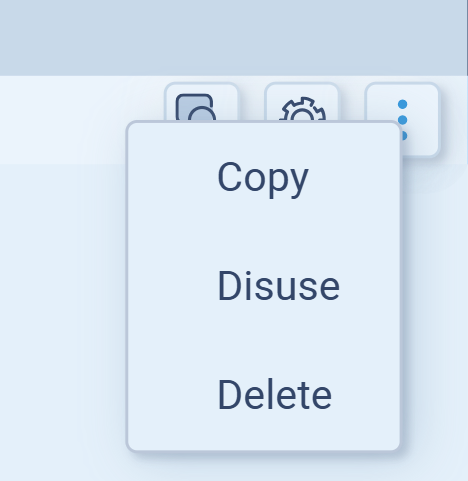
From the ⋮ (three-dot) menu, you can quickly manage a pricing group:
-
Copy → Duplicate the pricing group to set up a similar one.
-
Disuse → Archive the group so it’s no longer active (kept for record).
-
Delete → Permanently remove the pricing group.
This is a faster way to manage pricing groups if you don’t need to open full settings.
Filtering Pricing Groups
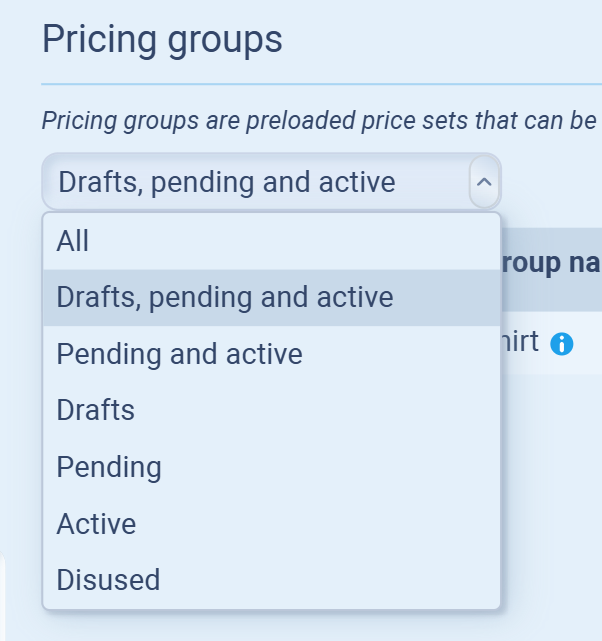
You can filter pricing groups by their status using the dropdown menu:
-
All → Shows every pricing group.
-
Drafts, pending and active → Default view, shows all groups currently in use or being prepared.
-
Pending and active → Groups that are scheduled or already live.
-
Drafts → Groups you’ve created but not yet activated.
-
Pending → Groups scheduled to start in the future.
-
Active → Groups currently applied to sales orders.
-
Disused → Archived groups no longer in use (kept for reference).
This helps you manage different stages of your pricing setup without clutter.
Customer Billing & Collections
The Billing tab inside a customer profile helps you track and manage payments.
Think of it as your customer account statement: you’ll see how much each customer still owes, what’s invoiced, and what’s collected.
What you see in Billing
-
Order amount outstanding → Value of all unpaid sales orders.
-
Billable amount outstanding → Amounts confirmed and ready to be invoiced.
-
Amount billed outstanding → Invoices sent but not yet paid.
-
Account detail → A breakdown of each order’s billing status.
-
Invoicing & collections → Shortcut to issue invoices or record payments.

Recording a Collection (Customer Payment)
When a customer pays you, record it so the system can update outstanding balances.
Steps:
-
Go to Customers → Select a customer → Open Billing.
-
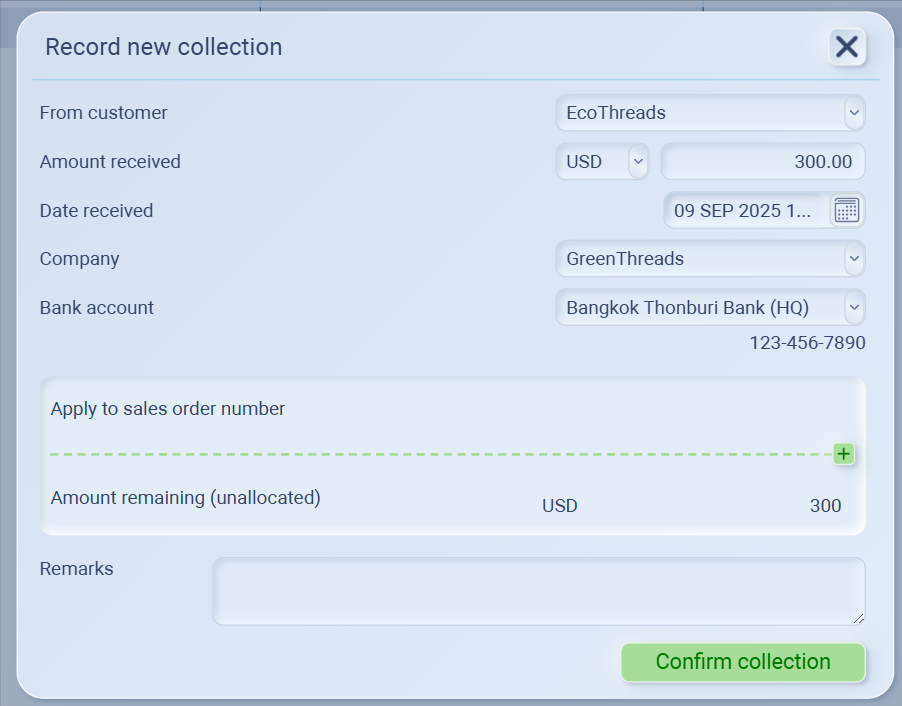
Click the green + button (top right) to Record new collection.

-
Fill in the payment details:
-
From customer (select the customer)
-
Amount received and currency
-
Date received
-
Company receiving the money
-
Bank account used
-
-
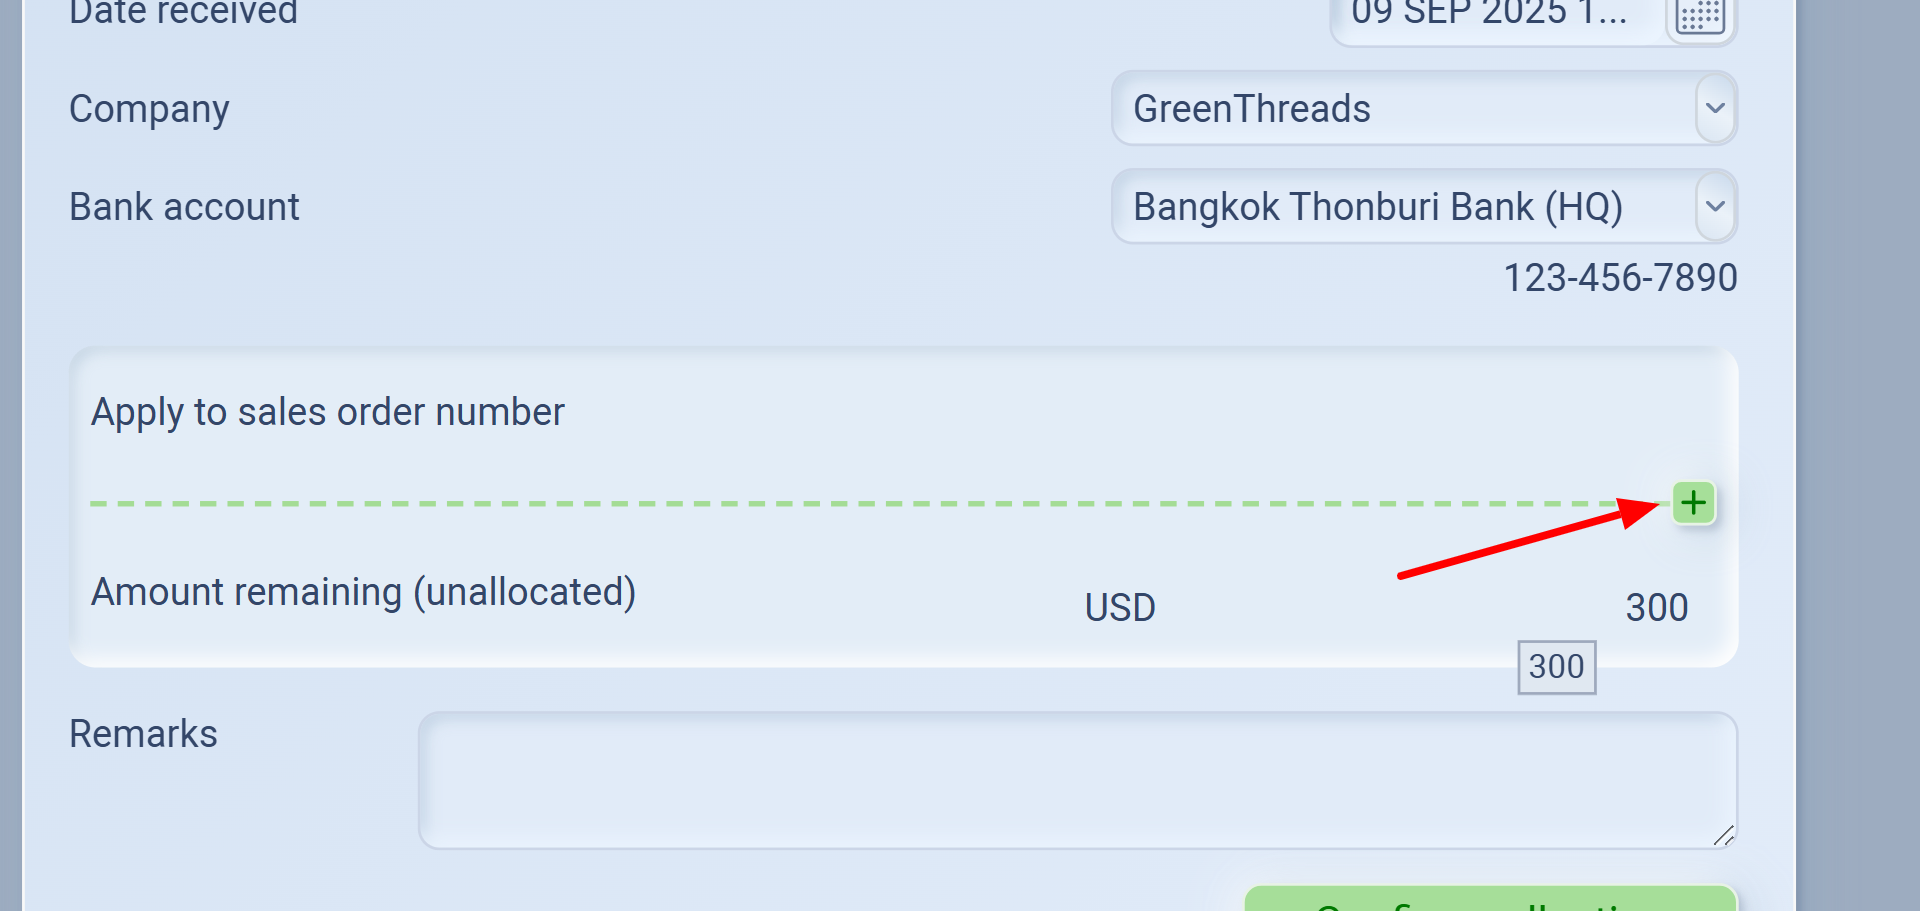
Apply the payment to the correct Sales Order number by clicking + under “Apply to sales order number”.
-
If the amount covers the full order, the outstanding balance will be cleared.
-
If it’s partial, the remaining amount will still show as outstanding.
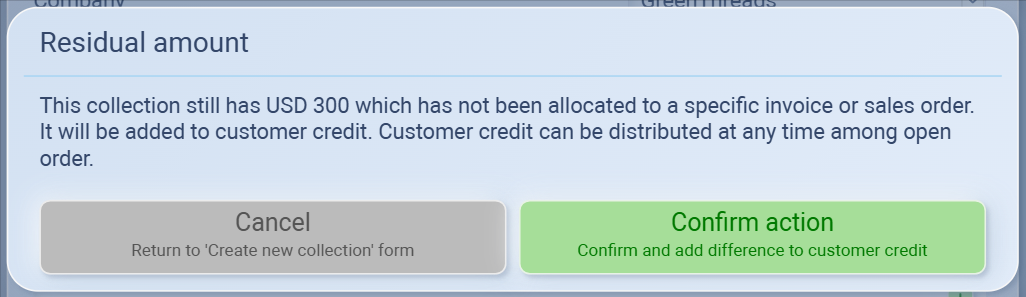
If you skip allocating the payment to a sales order, the system will prompt:“This collection still has USD [amount] which has not been allocated. It will be added to customer credit.”
-
The payment is stored as customer credit.
-
Credit can be applied later to any open or future orders.
-
On the customer list, you’ll see it marked as (credit balance), e.g. EcoThreads (credit balance) (300.00).
 ✅ Use this option if the customer paid in advance, overpaid, or you don’t yet know which order it belongs to.
 -
-
- Add remarks if needed (e.g., “Advance payment” or “Bank transfer ref. no.”).
-
Click Confirm collection to save.
-
Allocate when possible → Keeps records clean and avoids confusion.
-
Credit is flexible → Safe for advance payments but remember to apply it later.
-
Check balances regularly → Before following up with a customer, always review their Billing tab.
Invoices & Collections (Per Order)
The Account Detail view lets you drill down into each sales order and manage its billing.
This is where you issue invoices and track collections against a specific order.
Think of it as the transaction-level view: instead of seeing a customer’s overall balance, you manage invoices and payments tied directly to one order.
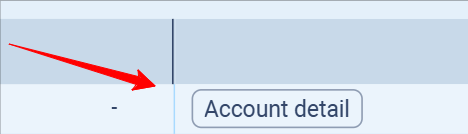
Step 1: Open Account Detail
-
Go to Customers → select a customer → Billing.
-
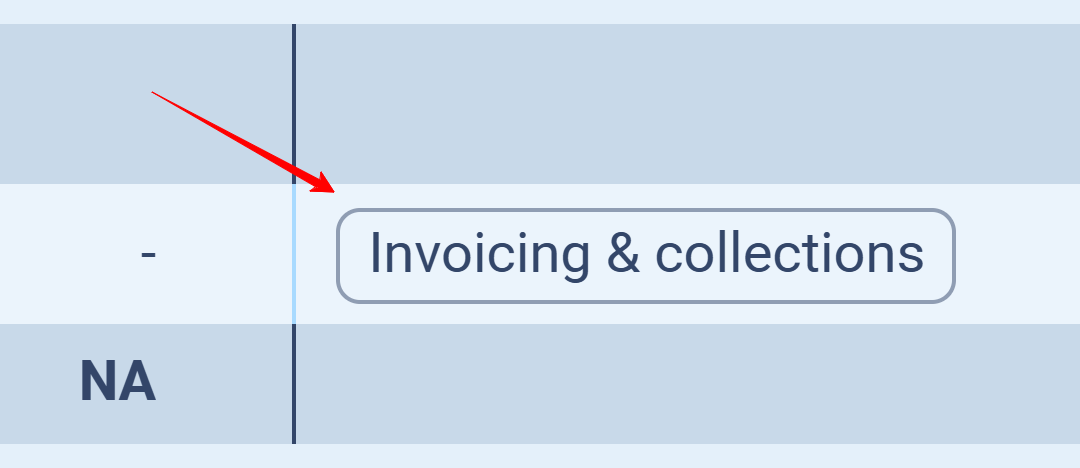
Click Account detail next to an order.
-
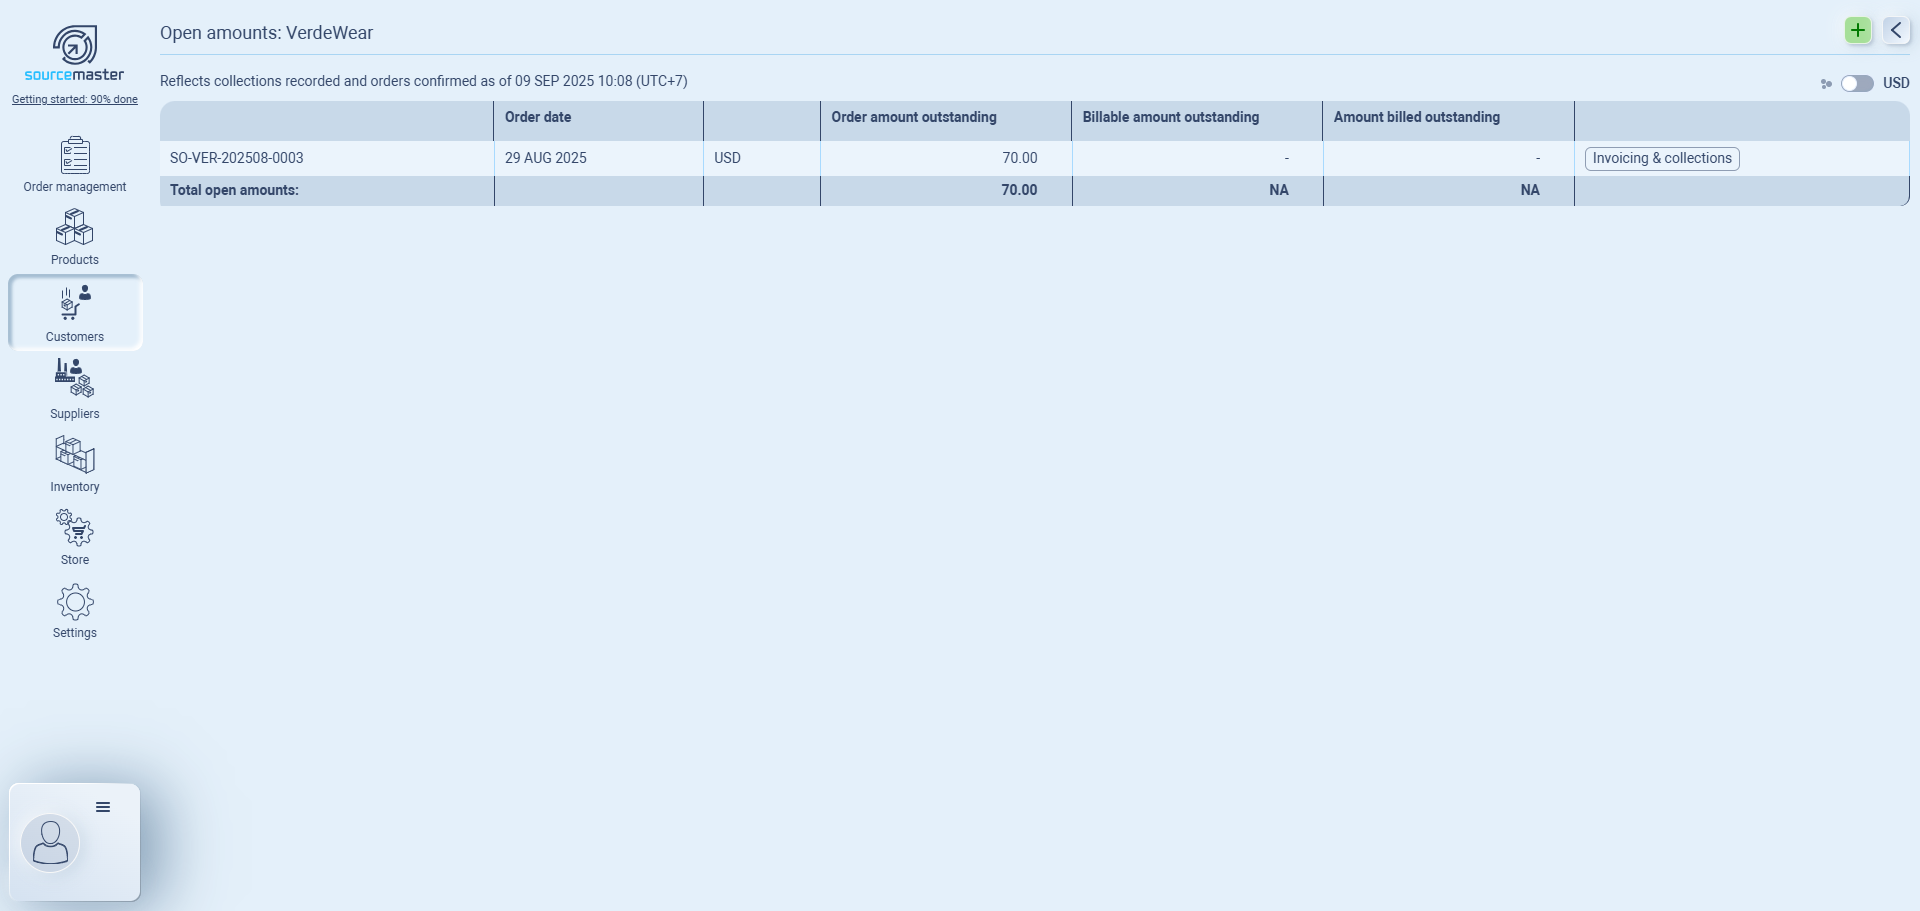
This opens the Open amounts view for that order.
Step 2: Invoicing & Collections
Inside the open amounts, you’ll see the order listed.
From here, click Invoicing & collections to issue invoices or manage collections.
Step 3: Invoicing & Collections
Inside the order’s Invoicing & Collections window you’ll find: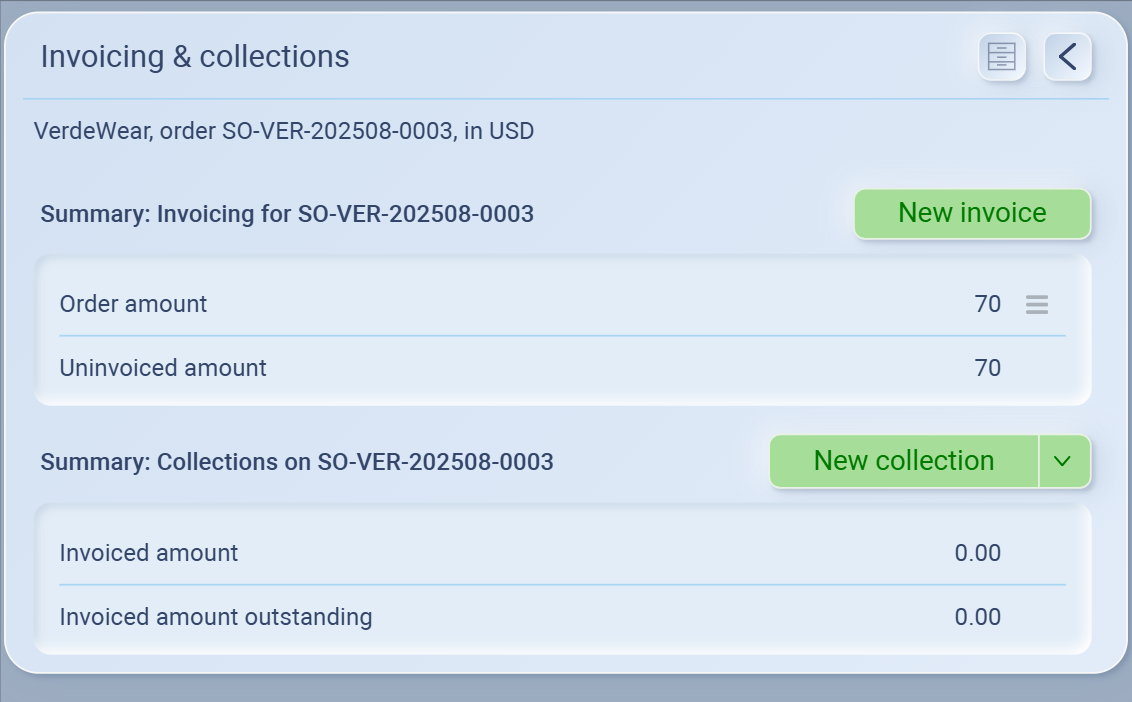
-
Order amount → Total value of the order.
-
Uninvoiced amount → Amount not yet billed.
-
Invoiced amount → What has already been invoiced.
-
Invoiced amount outstanding → What’s billed but not collected.
You also get two main actions:
-
New invoice → Issue an invoice for all or part of the order.
If you want to issue a new invoice
Click New invoice.
Fill in the invoice details:
Date for invoice
Amount for invoice (full or partial)
Bank account where payment should be made
Optional Remarks (e.g., “50% advance invoice”).
Click Issue invoice.
✅ The uninvoiced amount will decrease, and the invoiced amount will increase accordingly.
Step 4: Managing Collections
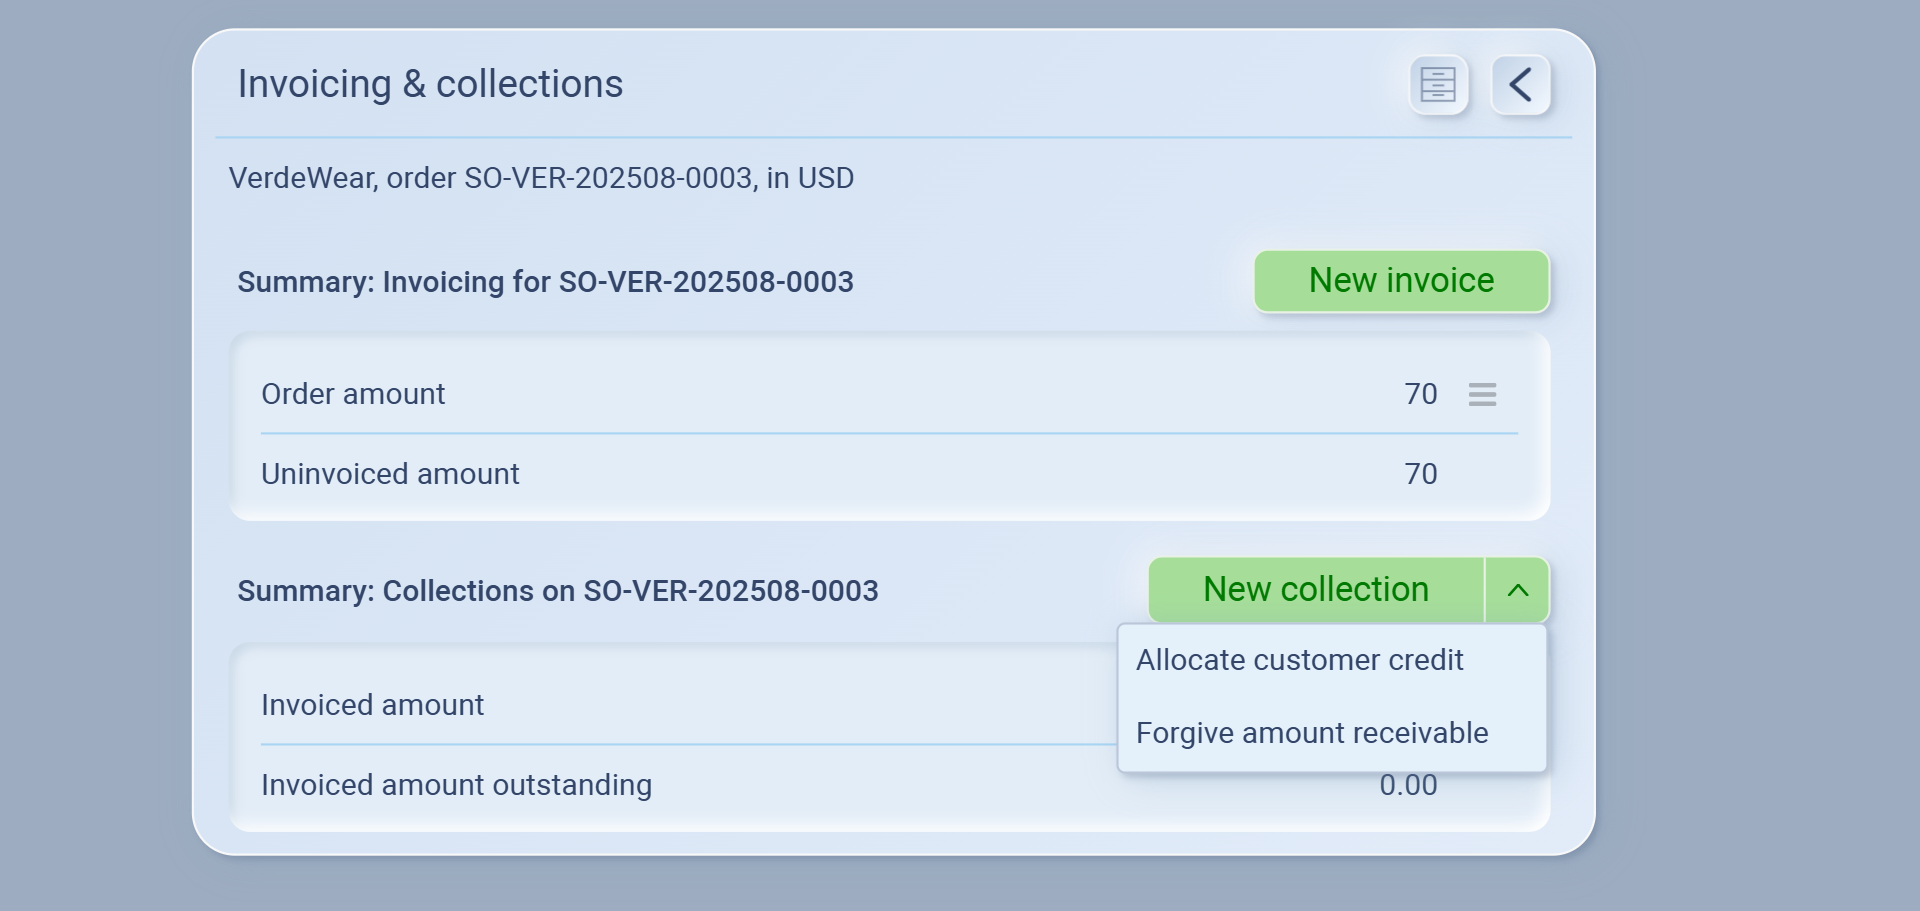
From the same window, you can:
-
Record a new collection → log payment received against the invoice.
-
Allocate customer credit → apply existing credit to this order.
-
Forgive amount receivable → write off amounts you no longer expect to collect.
-
Issue invoices before recording collections, unless it’s an advance payment (in which case use Customer Credit).
-
Use partial invoices if your business collects deposits or milestones instead of full payment upfront.
-
Always check the Uninvoiced amount before issuing a new invoice to avoid duplicates.
Billing History
From the Invoicing & collections window, click the Billing history icon (top right).
This shows a timeline of all billing events for that order, such as:
Beginning balance
Order placed
Invoices issued
Payments collected
Balance updates
✅ Use this history to trace how the order’s financials have changed over time.

💡 If this doesn’t solve your issue or you have more questions, feel free to reach out through our [contact form]. We’ll get back to you within 2–3 business days.